Thank you for providing this manual and at low cost.
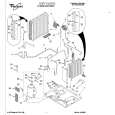
The Philips scope is of excellent quality, longevity and build and had a couple of faults
when it was passed to me. Having the CCT diagrams is a blessing.
I have fixed the problems and also modded the scope to my requirements.
I have built a 24v Li-Ion pack for portable use from old but good laptop batts.
it is working beautifully and I am well pleased. Keep up the good work Guys.
Awesome quality manual. You really saved my bacon with this one. Was looking for some specific information with regards to my "new" vintage VCR that didn't come with the owners manual. This site is truely a goldmine of available manuals. The quality of the scans are top notch.
Thank-you so much for this awesome manual. If you're looking for this Sony SL-HF400 owners manual, this is the one you NEED to buy. Definitely worth the money.
The manual was made available promptly. I is a clean scan of the original. I had no problem downloading it. The scan was well centered and cleanly formatted. It is as good a product as can be had without being the original document.
Received downlink in less then 8 hours, Item was in good copy condition, and told me how to program the clock timer. The price was very resonable, and the process was very automated and was GREAT to work with.
Text excerpt from page 14 (click to view)
Se è selezionata la funzione 3in1, inserite l'alimentazione del brillantante.
3
Se la funzione 3in1 non è selezionata, l'alimentazione del brillantante è sempre inserita. Se, a causa dell'impiego di detergenti 3in1, la funzione 3in1 è selezionata, l'alimentazione del brillantante è disinserita. Se le stoviglie non sono sufficientemente asciutte, dovete inserire nuovamente l'alimentazione del brillantante (vedere anche capitolo "Impiego del detergente 3in1"). 1. Premete il tasto ACCESO/SPENTO. Se si illumina solo il display a LED di un tasto programma, questo programma di lavaggio è attivato. Il programma di lavaggio deve essere deselezionato: premete contemporaneamente i tasti funzione 2 e 3 per circa 2 secondi. Si accendono i display a LED di tutti i tasti programma.
3
2. Premete contemporaneamente e tenete premuti i tasti funzione 2 e 3. I display a LED dei tasti funzione da 1 a 4 lampeggiano. 3. Premete il tasto funzione 2. L'indicatore a LED del tasto funzione 2 lampeggia. Il multidisplay visualizza l'impostazione corrente:
0d 1d
l'erogazione del brillantante con 3in1 e' disinserita. (preimpostazione di fabbrica) l'erogazione del brillantante con 3in1 e' inserita
4. Premendo il tasto funzione 2 l'aggiunta di brillantante viene inserita o disinserita. 5. Se il multidisplay visualizza l'impostazione desiderata, premete il tasto ACCESO/SPENTO. L'impostazione è memorizzata.