Actually, I was looking for this information for 3 years!...now thanks to you, the manual is on my hands and of great help, cause I understand now where I was doing wrong connections and wires...excellent, I'll be back to you if in need, thank you.
This manual covers the main equipment features only. While it also includes the procedure for saving and loading from the now long obsolete memory cards it does not mention the how to operate with the optional floppy drive interface so I am still at a loss about how to use this! Note that there is a separate manual covering the MIDI interface and programming via the keyboard, not included in this download. You will also need to get hold of this if you want to use the MIDI interface properly. Basically there is little difference between this manual and the free to download manual for the similar PR60 model.
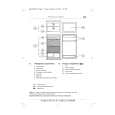
En un conducto de desagüe situado a una altura no inferior a 60 cm y no superior a 90 cm. La extremidad del tubo de desagüe debe ser siempre ventilada, o sea el diámetro interno del conducto de desagüe debe ser más ancho que el diámetro externo del tubo de desagüe. El tubo de desagüe no debe estar retorcido. Se deberá desplazar sobre el suelo y subirlo sólo cerca del desagüe.
Descarga de agua
Se puede instalar el recodo del tubo de desagüe en tres modos diferentes: En el borde de un lavabo usando el recodo de plástico suministrado con el aparato. En este caso es necesario verificar que el recodo no se mueva del borde cuando el aparato descarga el agua. Por ejemplo, se lo puede fijar al grifo o a la pared con una cuerda.
Una vez que se haya instalado la máquina asegurarse de que se pueda acceder fácilmente al cable de alimentación.