Shopping cart is empty
 
English Polski Spanish 
Search For a Manual
 

(e.g. AA-V20EG JVC, ZX-7 Sony )
PayPal 1000+ rating Secure, Encrypted Checkout.
 
Who's Online
There currently are 5762 guests online.
Support Info
ELECTROLUX
First point of contact:
All trademarks are the property of their respective owners
Categories
Information
Featured Product
Home >> ZANUSSI >> ZC24/10FS Owner's Manual
 
 0 item(s) in your cart 

ZANUSSI ZC24/10FS
Owner's Manual


Tweet about this product and get $1.00 of store credit for instant use!
  • Download
  • PDF Format
  • Complete manual
  • Language: English, German, French, Dutch
Price: $4.99

Description of ZANUSSI ZC24/10FS Owner's Manual

Complete owner's manual in digital format. The manual will be available for download as PDF file after You purchase it.

Owner's Manual ( sometimes referred to as User's Guide or User's Manual ) contains information on how to use Your device. After placing order we'll send You download instructions on Your email address.

The manual is available in languages: English, German, French, Dutch

Not yet ready
You must purchase it first

Customer Reviews
There are currently no product reviews.
Other Reviews
 21AA3356/20B PHILIPS Owner's Manual by Matteo Vannini;
Very well done!!!!! congratulations. It was a bit longer than usual the wiating time even if it was on time (in 24 hours).
 TRK4850 BAUKNECHT Owner's Manual by amgad saweris;
Last week I bought a second hand BAUKNECHT TRK4850 DRYER. It is a professional machine with many programs and switch options. I feared it would be a huge quest to find a manual. I was delighted when I found owner-manuals.com. After payment I received the file to download the next day already. The quality is great. I am very happy. Thanks! but kindly the distributions of the operating programs not find in the owners manual,can you help me to understand the operating programs instructions thank you
 AU-719 SANSUI Owner's Manual by John McKenna;
Very good copy, very readable and easy transaction as always.
 ADP 4502/5/S WHIRLPOOL Owner's Manual by Phil Atkinson;
It is perfect, exactly what we needed. It's like the paper version but less clutter.
 WM 2105 SIEMENS Owner's Manual by deleteme deleteme;
Received my manual within 24 hours. Very clear scan of the manual I needed. Thanks!

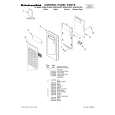
Text excerpt from page 5 (click to view)
�nderung der öffnungsrichtung der Türen
Wenn Sie die �ffnungsrichtung der Türen ändern möchten, gehen Sie bitte wie folgt vor: 1... �ffnen Sie die Tür des Gefrierabteils. Alle Geräte verfügen über einen Lüftungssockel im unteren Teil. Entfernen sie den Sockel, indem Sie oben darauf drücken und ihn nach au�en ziehen. Nun können Sie den kleinen Sockeldeckel auf der anderen Seite anbringen (vgl. Abb. 7). 2... �ffnen Sie beide Gerätetüren und lösen Sie die äu�ere Schraube des mittleren Scharniers, schlie�en Sie die Gefrierschranktür, lösen Sie die andere Schraube des mittleren Scharniers und schlie�en Sie die Kühlschranktür. Ziehen Sie an beiden Türen nach au�en, bis Sie aus den Bolzen gleiten, wobei sorgfältig darauf geachtet werden mu�, da� sie nicht hinunterfallen. Stellen Sie nun die Türen auf den Boden. 3... Bringen Se die Bolzen des oberen und unteren Scharniers sowie die Plastikstopfen der Zwischenwand auf der gegenüberliegenden Seite an. 4... Wechseln Sie die automatische Verschlu�vorrich-tung der Türen, indem Sie diejenige der Gefrier-schranktür mit derjenigen der Kühlschranktür austauschen. 5... Bringen Sie nun die untere Tür an, indem Sie diese am Bolzen des unteren Scharniers einführen und bringen Sie das mittlere Scharnier an der Tür an. 6... Führen Sie die Kühlschranktür am Bolzen des oberen Scharniers ein. Nun ziehen Sie an beiden Türen nach au�en, wodurch sie auch am Bolzen des mittleren Scharniers einhängen. Bringen Sie nun die Türen in ihre korrekte Position. 7... Nun öffnen Sie die obere Tür und befestigen die innere Schraube des Mittleren Scharniers; danach öffnen Sie die Tür des Gefrierabteils und bringen die andere Schraube an. 8... Montieren Sie die Sockelleiste mit offener Tür und nähern Sie sie dem Metallteil. Führen Sie die zwei unteren Laschen des Sockels im Metallteil ein. Drücken Sie sodann die zwei oberen Haken nach unten (ohne aufhören zu drücken). Nun sto�en Sie das Kunststoffteil bis es einrastet (vgl. Abb. 8). Nach Abschlu� dieses Vorgehens, überprüfen Sie bitte, ob alle Türdichtungen überall hermetisch schlie�en und ob das Licht ausgeht, sobald die Tür geschlossen wird.

Abb. 7

Abb. 8
37

You might also want to buy

$4.99

SX-K700 TECHNICS
Owner's Manual

Complete owner's manual in digital format. The manual will be available for download as PDF file aft…

$4.99

CJ-V51 PIONEER
Service Manual

Complete service manual in digital format (PDF File). Service manuals usually contains circuit diagr…

$4.99

GRAND PRIX ELECTRONIC 754 BECKER
Service Manual

Complete service manual in digital format (PDF File). Service manuals usually contains circuit diagr…

$4.99

SX-PR602 TECHNICS
Service Manual

Complete service manual in digital format (PDF File). Service manuals usually contains circuit diagr…

$4.99

EV-S1000E SONY
Owner's Manual

Complete owner's manual in digital format. The manual will be available for download as PDF file aft…

$4.99

GRAND PRIX ELECTRONIC 780 BECKER
Service Manual

Complete service manual in digital format (PDF File). Service manuals usually contains circuit diagr…

$4.99

AG7330 PANASONIC
Service Manual

Complete service manual in digital format (PDF File). Service manuals usually contains circuit diagr…

$4.99

EVO-9850 VOLUME 1 SONY
Service Manual

Complete service manual in digital format (PDF File). Service manuals usually contains circuit diagr…
>
Parse Time: 2.011 - Number of Queries: 136 - Query Time: 0.684