|
There are currently no product reviews.
 ;
The manual was made available promptly. I is a clean scan of the original. I had no problem downloading it. The scan was well centered and cleanly formatted. It is as good a product as can be had without being the original document.
 ;
Received downlink in less then 8 hours, Item was in good copy condition, and told me how to program the clock timer. The price was very resonable, and the process was very automated and was GREAT to work with.
;
Fast service, document is OK. Thanks! Searched for it long time.
;
I was very pleased with the manual I got for my amateur (ham) radio. Without it I could not figure out how to input and/or change the P/L setting on my radio. It drove me nuts as the radio was essentially useless. That all changed when my manual came. Then it took only minutes and I was done. Now my radio works fine. This is an exceptionally good resource as it's a very easy and user friendly download. Thank you very much! Dziękujemy za!
;
It answered my question, which was how to load the paper. I did notice that the very end of the manual was not visible.
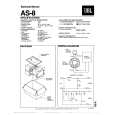
AS Series Owner�s Manual
9/11/98 12:51 PM
Page 6
New Construction
�1-1/2" �1-1/2" �1-1/2"
Step One: Remove the grille from the speaker frame.
Step Two: Determine the correct speaker location.
Step Three: Attach the proper mounting brackets, marked and preset at 3/8" 1/2" 5/8" and 3/4" corre, , , , sponding to the thickness of the dry wall, to the speaker frame.
Step Four: Nail or screw the speaker-frame assembly to the wall studs and route the wires through the frame opening.
After the Drywall is Installed
Step Five: Cut the drywall.
Step Six: Connect the speaker wires to the baffle assembly and install baffle assembly in frame. Do not overtighten the baffle screws.
Step Seven: Replace the metal grille.
|