|
|
|
Categories
|
|
Information
|
|
Featured Product
|
|
|
 |
|
|
There are currently no product reviews.
 ;
y'm hapy for this shoping . Estoy feliz por esta compra , ahora puedo reparar mi equipo de audio que AMO . And very good price for this manual . Thank yuo .
;
Perfect manual, perfect service. Easy reading. Thanks a lot
;
Very good quality download here. Great hard to find manuals at a reasonable price.
 ;
I had a problem with the mains transformer, I did not know the voltages on the secondary, this manual helped me to solve this problem, thanks for the manual!
;
Great manual, great quality copy, complete parts reference and scematics, Thank you
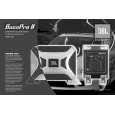
BassPro II
INSTALLING THE REMOTE
The Subwoofer Level Control may be mounted under the dash or dismantled and mounted in the dash for a factoryinstalled appearance. UNDER-DASH MOUNTING Select a mounting location that allows easy access to the control while driving. Using the Subwoofer Level Control as a template, mark and drill holes in the mounting surface. Attach the Subwoofer Level Control using the mounting screws provided (Figure 4). IN-DASH MOUNTING Disassemble the Subwoofer Level Control by removing the two Phillipshead screws on the front panel, rear panel and on top. Remove the Subwoofer Level Control�s bottom and side panels. Slide the Subwoofer Level Control�s PC board forward to release the RJ11 connector from the back panel and remove the board along with the potentiometer, knob and connector as a single assembly. Choose a mounting location that allows easy access to the control, and provides 1-3/4" clearance behind the mounting surface. Drill a 9/32" hole in the mounting surface. Feed the Subwoofer Level Control�s potentiometer shaft (with the knob removed) through the hole and use the nut and washer provided to hold the control in place (Figure 5).
CONNECTING THE SUBWOOFER LEVEL CONTROL TO BASSPRO II
Route the cable behind the dash or other interior panels and under the carpet. Do not route the cable outside the vehicle. Connect the RJ11 cable between the RJ11 receptacle on the BassPro II and the receptacle on the Subwoofer Level Control (Figure 6). BassPro II Connection Panel
Control Cable
Socket Socket for for Control Control Cable Cable
Rear View of Level-Control Circuit Board Figure 6. Subwoofer Level Control electrical connection.
Washer Washer HexNut Hex Nut
Knob Knob
Level LevelControl Control Circuit Circuit Board Board
Figure 5. In-dash mounting of the Subwoofer Level Control.
Figure 4. Under-dash mounting of the Subwoofer Level Control.
7
|
|
|
> |
|