|
|
|
Categories
|
|
Information
|
|
Featured Product
|
|
|
 |
|
|
There are currently no product reviews.
 ;
very helpful, I could not have cleaned motherboard and replaced the main fan without it
 ;
Good manual, schematics nice and clear with good quality scanning. Woul dhave been nice to have immediate access after purchasing though.
;
I was very glad recieving the service manal from You. Manuals were delivered promptly and were correct as advertised. A complete and very usefull service manual with all details. Thank you!
;
Very clear copy. No pages missing. Big bonus is that it includes supplement. Price is affordable compared to what others ask for.
;
Found the quality of the copy excellent and a very quick service. I would certainly recommend the service.
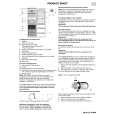
OSD Adjustment
On the front controls of your monitor, once you press the button, the OSD Main Controls window will pop up and you can now start making adjustment to your monitor's various features. Use the or the keys to make your adjustments within.
109PB2 GS3 CM25
Go to cover page
5
The OSD Tree
Below is an overall view of the structure of the OSD. You can use this as reference when you want to later on work your way around the different adjustments.
Brightness
To adjust your screen's brightness, follow the steps below. Brightness is the overall intensity of the light coming from the screen. A 50% brightness is recommended. 1. Press the or window appears. button on the monitor. The BRIGHTNESS
2. Press the
or
button to adjust the brightness.
3. When the brightness is adjusted to the level desired, stop pressing the or button and after three seconds the BRIGHTNESS window will disappear with the new adjustment saved.
Contrast
To adjust your screen's contrast, follow the steps below. Contrast is the difference between the light and dark areas on the screen. A 100% contrast is recommended. 1. Press the or window appears. button on the monitor. The BRIGHTNESS
2. Press the
or
button to adjust the brightness.
3. When the brightness is adjusted to the level desired, stop pressing the or button and after three seconds the BRIGHTNESS window will disappear with the new adjustment saved.
Back
Forward
|
|
|
> |
|