|
|
|
Categories
|
|
Information
|
|
Featured Product
|
|
|
 |
|
|
There are currently no product reviews.
 ;
Good quality, all schematics of few of models. There is also short form of user manual and regulation manual.
;
Perfect copy of the service manual. you can enlarge every page, and it comes up
with all details.
;
It´s very very nice manual with all, what i need. Original in good quality. Very fast business. Very much thanks...
;
Purchased the manual that I was looking for at a great price and could download it easily.. Great service experience and for future purchases I plan to use the site.
Thank you very much
;
Exactly what was needed to assess the product - excellent value and great service
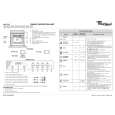
Service Menu Service Submenu1 Dclock Polarity Falling UOC Hposition * ADC_Calibration UOC_Calibration ** Service Submenu2 Factory Settings Init NVM Country *** Initial APS off Language *** Hotel Mode Activate off Panel Type SAMSUNG 15_XGA Burn-In Mode off Menu Background Opaque Remote Control PC Mode *** on
* ** *** �
This value indicates the horizontal positioning of the picture. In this row �Software version and date is mentioned� These will be changed according to the DI.
It is possible to move by using �UP�, �DOWN�, �LEFT� and �RIGHT� RC buttons in this menu structure. UOC Horizontal Position Press �DOWN� RC button at �Service Submenu 1� to highlight �UOC Hposition� Set the proper value to fit the applied pattern to screen by using �LEFT� and �RIGHT� buttons. UOC Calibration Apply 11 Vertical bar Grey-scale pattern with black on the left and white on the right side of the picture (as seen below) from CVBS input. Press RC �AV� button, and switch to CVBS input and observe the pattern applied. Enter to PW1306 service menu. Press RC �DOWN� button at �Service Submenu 1� and highlight �UOC Calibration�. Press RC �RIGHT� button to start calibration.
4.2.2. 4.2.1.
� �
� � � � �
� � � � � � � �
PW1306 PC Input ADC Calibration Connect your TV with your PC and press RC �PC� button and observe the image. Press �M� to display Menu and select �Options� by using right button of RC. Press �Down� button of the RC and activate �auto adjustment�. Press right button of the RC to perform �auto adjustment� and press �M� to exit from Menu. Apply black on the left, white on the right (as seen below) XGA@60Hz (1024x768) pattern from PC. Enter PW1306 service menu as described above. Press RC �DOWN� button at �Service Submenu 1� and highlight �ADC Calibration�. Press RC �RIGHT� button to start calibration.
4.2.3.
15� TFT TV Service Manual
38
|
|
|
> |
|