|
|
|
Categories
|
|
Information
|
|
Featured Product
|
|
|
 |
|
|
There are currently no product reviews.
 ;
Excellent manual including schematics. The service was great and the manual helped complete the job.
;
It was magic after so many years to still be able to source this info. It was equally amazing to return my Pioneer receiver to it near new sound quality AFTER NEARLY 30 YEARS! Thank you for this ability!
;
Very quick and easy website to use and fast download of manual, quality of manual is excellent and will be pleased to use this service again in the future, thanks so much!
 ;
Easy and secure way to get a complete service manual of a vintage hifi component. Only some parts of the print copy are dificult to read. Nice price!
;
The manual is an excellent reproduction with complete schematics, made troubleshooting and repair a simple process.
ITEM WIDTH (WID)
ADJUSTMENT PROCEDURE 1. Call up the adjustment mode display, then select the item WID. 2. Press the ; � /+ button to get the picture so the left and rightedges of raster begins to lack. 3. Press the ; � /+ button to advance the data by 7 steps. Note : Check the horizontal picture position is correct. 1. Call up the adjustment mode display, then select the item PARA. 2. Press the a button on Remote until the cross-hatch pattern appears on the screen. 3. Press the ; � /+ button to make vertical lines straight as shown below.
E-W PARABOLA (PARA)
WHITE BALANCE ADJUSTMENT
� CUTOFF ADJUSTMENT
(RCUT) (GCUT) (BCUT)
� DRIVE ADJUSTMENT
(GDRV) (BDRV)
1. Set Contrast to 40, and brightness to +20 by picture control. 2. Receive the Black and White pattern. 3. Select RCUT, GCUT and BCUT with CHANNEL s, t buttons, to set individual values to Initial reference data, and to set GDRV and BDRV to Initial reference data with VOLUME ; � /+ buttons (See page 18). 4. Press -/- - button on the remote control and rotate Screen VR to get one slight horizontal line on screen. Note: Every pressing of -/- - button provides Horizontal line picture and Normal picture alternately. 5. Press -/- - button to release horizontal line picture, and select the two other colors which did not light in the above step with CHANNEL s, t buttons. Then tap VOLUME ; � /+ buttons so that three colors slightly light in the same level. X To correct white balance in light area, select GDRV and BDRV with CHANNEL s, t buttons to adjust. X To correct white balance in dark area, perform fine adjustment of RCUT, GCUT and BCUT. Light area check (to show white)
Dark area check (to show black)
� 11 �
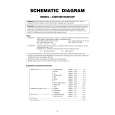
SPECIFIC INFORMATIONS GENERAL ADJUSTMENTS
|
|
|
> |
|