|
|
|
Categories
|
|
Information
|
|
Featured Product
|
|
|
 |
|
|
There are currently no product reviews.
 ;
This manual was the factory original. Excellent value and contained all the details I needed. Easy dowwnload provided the information when I needed it.
 ;
Impeccable, document très complet. Perfect, i get all i need. All schematic are correct. Thanks
;
The manual is of better quality compared to other. I found it less expensive and therefore it it is the best buy cost vs quality.
;
I bought the service-manual of the sony ICB-1020(an old transmitter-receiver) at "www.Owners-Manual.com", I found the service-manual for a fairly cheap price(in comparison with other sellers). I filled in some questions, payed the order with Ideal, and within 24 hours I had my service manual. I was very happy:In no time I had my service-manual and everything, but literally everything was noted down in the manual; the electronic scheme, the parts list, etcetera.
A very practical, reference-document.
;
This comprehesive service maual was greatly appreciated, as was the digital download.
ITEM WIDTH (WID)
ADJUSTMENT PROCEDURE 1. Call up the adjustment mode display, then select the item WID. 2. Press the ; � /+ button to get the picture so the left and rightedges of raster begins to lack. 3. Press the ; � /+ button to advance the data by 7 steps. Note : Check the horizontal picture position is correct. 1. Call up the adjustment mode display, then select the item PARA. 2. Press the a button on Remote until the cross-hatch pattern appears on the screen. 3. Press the ; � /+ button to make vertical lines straight as shown below.
E-W PARABOLA (PARA)
WHITE BALANCE ADJUSTMENT
� CUTOFF ADJUSTMENT
(RCUT) (GCUT) (BCUT)
� DRIVE ADJUSTMENT
(GDRV) (BDRV)
1. Set Contrast to 40, and brightness to +20 by picture control. 2. Receive the Black and White pattern. 3. Select RCUT, GCUT and BCUT with CHANNEL s, t buttons, to set individual values to Initial reference data, and to set GDRV and BDRV to Initial reference data with VOLUME ; � /+ buttons (See page 18). 4. Press -/- - button on the remote control and rotate Screen VR to get one slight horizontal line on screen. Note: Every pressing of -/- - button provides Horizontal line picture and Normal picture alternately. 5. Press -/- - button to release horizontal line picture, and select the two other colors which did not light in the above step with CHANNEL s, t buttons. Then tap VOLUME ; � /+ buttons so that three colors slightly light in the same level. X To correct white balance in light area, select GDRV and BDRV with CHANNEL s, t buttons to adjust. X To correct white balance in dark area, perform fine adjustment of RCUT, GCUT and BCUT. Light area check (to show white)
Dark area check (to show black)
� 11 �
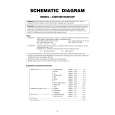
SPECIFIC INFORMATIONS GENERAL ADJUSTMENTS
|
|
|
> |
|