|
|
|
Categories
|
|
Information
|
|
Featured Product
|
|
|
 |
|
|
There are currently no product reviews.
 ;
Hr, klasse , good manual, verry fast on my e-mail, very usefull manual. rgds; ahm zeegers
;
I received the owners manual complete download. Wow did it help me. So glad for your website. Can you include an ownersmanual for people lol!
Thanks, sure I will be back
;
fast response great copy easy to download quick to correct mistakes
;
This manual provided the necessary information to properly use the C-3 deck. The manual was an excellent reproduction and very clear.
;
Product was very good. Received quickly and complete
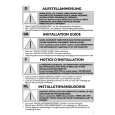
Aufstellen
Türanschlagwechsel
Bevor Sie Ihr Gerät an das Stromnetz anschliessen, sollten Sie prüfen, ob der Türanschlag von rechts (Lieferzustand) nach links gewechselt werden muss, falls der Aufstellort und die Bedienbarkeit dies erfordert. Gehen Sie wie folgt vor (Für die Montage und Justierung der Türscharniere liegt ein Universalschlüssel bei): - Tür öffnen und Sockelblende (A) abnehmen und Tür wieder schliessen. - Abdeckung (B) umsetzen. B A - Tür öffnen und Sockelblende einsetzen. - Gerät vorsichtig auf den Rücken legen, evtl. Verpackungsmaterial unterlegen. Darauf achten, dass die Rohrleitungen bzw. der Verflüssiger nicht verbogen oder beschädigt werden, der Fussboden nicht verkratzt oder anderweitig beschädigt wird. - Oberen Scharnierstift (C) herausschrauben und an der gegenüberliegenden Seite wieder einschrauben. - Unteres Scharnier (D) abschrauben und Scharnierstift (E) umsetzen. - Unteres Scharnier (D) montieren und den Scharnierstift so justieren, dass die Türe kein Spiel mehr hat. Schrauben einfetten! C Bitte achten Sie darauf, dass alle Distanzscheiben und Unterlagen wieder an gleicher Stelle eingesetzt sind. �berprüfen Sie nach dem Türanschlagwechsel unbedingt, dass die Türmagnetdichtungen einwandfrei am Gehäuse anliegen und alle Schrauben kraftschlüssig angezogen sind. - Den Türgriff absschrauben mit einer Haldbrehung (180°) auf der gegenüberliegenden Seite anschrauben. Die Blindstopfen vorher mit einem Dorn von ca. 3 mm Durchmesser durchstossen. Die alten Bohrungen sind mit neuen, im Beipack enthaltenen Blindstopfen zu verschliessen.
D
D E - Gerät wieder aufrichten.
9
|
|
|
> |
|