|
|
|
Categories
|
|
Information
|
|
Featured Product
|
|
|
 |
|
|
There are currently no product reviews.
 ;
Good quality instructions manual. Very useful to me. Quick and excellent service from Owner-Manuals... Thanks !!!
;
Sono molto soddisfatto e, quando mi necessiterà, mi avvarrò nuovamente di questo servizio!
;
A comprehensive Operating and Service Manual. All schematics are complete and easy to read. The PCB drawings and complete parts list are very helpful. I would definitely recommend this manual.
;
SCANNING OF HIGH QUALITY
VERY, VERY HIGH VELOCITY DOWNLOAD
VERY GOOD PRICE,
TRUE SATISFIED, THANKS
;
Genuine Toshiba owner's manual. Couldn't really ask for more. And written in understandable English in contrast to a few recent experiences I have had with manuals for other equipment other than Toshiba but made in China and written in "Chinglish"!
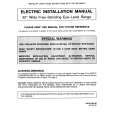
USING YOUR OVEN
OVEN
CHARACTERISTICS RACK POSITIONS: RACK 1 (topof oven) usedfor broiling thin non-fatty foodssuchasfish. RACK 2 used for two-rack baking or broiling thicker cuts of meat, RACK 3 used for most one-rack baking and for roasting some meats. RACK 4 usedfor oneortworack baking and roasting largemeats, cooking Do not cover entire with rack aluminum largerpie shells. baking foodsand for angel food foil orplaceoil f directly cookware. under cake or To catch spitlovers, cut a piece of foil a RACK 5 used for roastingturkey or bak- little larger than the pan and place it on ing angel food cake or pi_ shells, the rack below the rack containing the pan. NEVER place pans directly on the oven bottom.
FAN
L._his range is equippedwith a fan which _J_utornatcally turns on whenever the oven is set for cookingor cleaning,The fan will automatically turn off when the unit has cooled. /
/
It is not necessaryto preheatoven for roasting. It is not necessary to preheat for broiling unless darker browning is desired or if cooking thin (3/4-inch) steaks. Allow broil element to preheat 3 PREHEATING to 5 minutes. Selecting temperature higher than de-
OVEN RACKS
The two oven racks are designedwith a 'lock-stop" positionto keep racks from accidentally coming completely out of the oven. To remove: Be sure rack is cool. Pull up and continue pulling until rack releases, To replace: Place rack on rack supports, tilt up and push toward rear of oven. Pull rack out to "lock-stop" position to besure rack is correctlyreplaced,
HINTS If cooking ontwo racks, stagger pans so one is not directly over the other. Use rack positions 2 and 4 or 2 and 5, when cooking on two racks.
sired will NOT preheat the oven any faster. Preheating at a higher temperature may have a negative effecton baking results. To preheat: Set oven for bak(ngand allowthe oven to heat until display shows your model, either 75 or 100 will appear in the display until the oven reaches 100°F_If the oven temperature is above 100°, the display will show the actual oven temperature. The display will then show the oven temperature in 5° incremerits until the oven reachesthe preset temperature.
rack °ut t° the "l°ck-st°p" p°siti°n' 131t I "J
_
Once the preset temperature is 1 the preset temperature" Depend`nghas reached,and the oventemperature On stabRized,a single beep will sound. Iftheoventemperatureischangedafter preheating, a beep will signal that the oven has reachedthe new temperature setting.
Use racks 2 and 4 when baking layer cakes. Use racks 2 and 5 when baking cookies or biscuits on a cookie sheet,
-10-
|
|
|
> |
|