|
|
|
Categories
|
|
Information
|
|
Featured Product
|
|
|
 |
|
|
There are currently no product reviews.
 ;
The manual was made available promptly. I is a clean scan of the original. I had no problem downloading it. The scan was well centered and cleanly formatted. It is as good a product as can be had without being the original document.
 ;
Received downlink in less then 8 hours, Item was in good copy condition, and told me how to program the clock timer. The price was very resonable, and the process was very automated and was GREAT to work with.
;
Fast service, document is OK. Thanks! Searched for it long time.
;
I was very pleased with the manual I got for my amateur (ham) radio. Without it I could not figure out how to input and/or change the P/L setting on my radio. It drove me nuts as the radio was essentially useless. That all changed when my manual came. Then it took only minutes and I was done. Now my radio works fine. This is an exceptionally good resource as it's a very easy and user friendly download. Thank you very much! Dziękujemy za!
;
It answered my question, which was how to load the paper. I did notice that the very end of the manual was not visible.
4. Pour arrêter la minuterie, appuyer à nouveau sur TIMER ou appuyer sur POWER pour éteindre le climatiseur.
Pour mettre en marche ou arrêter le climatiseur :
Appuyer sur POWER.
Pour régler la mise en marche différée du climatiseur en gardant les réglages précédents :
1. Arrêter le climatiseur. 2. Appuyer sur TIMER. L'indicateur lumineux sur le climatiseur clignotera. L'affichage montre le temps restant avant que le climatiseur s'éteigne. 3. Appuyer sur le bouton �+� ou �-� pour changer la durée de délai (de 0,5 à 24 heures). 4. Appuyer à nouveau sur TIMER ou attendre 10 secondes. L'indicateur lumineux sur le climatiseur restera allumé.
Pour sélectionner le mode :
1. Appuyer sur MODE pour sélectionner Cool, Heat (sur certains modèles) ou Fan Only. 2. Appuyer sur POWER SAVER pour sélectionner le mode Power Saver. s Cool, Heat (sur certains modèles), Fan Only ou Power Saver�la vitesse du ventilateur peut être ajustée.
Pour régler un délai de 0,5 à 24 heures avant la mise en marche du climatiseur en changeant les réglages précédents :
1. Mettre le climatiseur en marche. 2. Régler le Mode sur Cool, Heat (chauffage�sur certains modèles), Fan Only ou appuyer sur POWER SAVER. 3. Ajuster la vitesse du ventilateur au mode Turbo, High (élevée) ou Low (basse). 4. Ajuster la température entre 66ºF (19ºC) et 88ºF (31ºC). 5. Attendre 3 secondes avant d�arrêter le climatiseur. 6. Appuyer sur TIMER. L'indicateur lumineux sur le climatiseur clignotera. L�affichage montre le temps restant avant que le climatiseur s'allume. 7. Appuyer sur le bouton �+� ou �-� pour changer la durée de délai (de 0,5 à 24 heures). 8. Appuyer à nouveau sur TIMER ou attendre 10 secondes. L'indicateur lumineux sur le climatiseur restera allumé. L'affichage indiquera la température ambiante actuelle.
Pour choisir la vitesse du ventilateur :
Appuyer sur AUTO, TURBO, HIGH (élevée) ou LOW (basse).
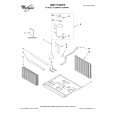
Pour faire fonctionner le climatiseur avec la télécommande
REMARQUE : L�apparence de la télécommande peut varier.
Pour augmenter la température :
Appuyer sur le bouton �+�. L'affichage montre le réglage de la commande de température. Chaque fois que l'on appuie sur le bouton �+�, la température augmente de 1º jusqu'à atteindre 88°F (31°C). REMARQUE : Après 3 secondes, l'affichage indiquera la température réglée.
Pour réduire la température :
Appuyer sur le bouton �-�. L'affichage montre le réglage de la commande de température. Chaque fois que l'on appuie sur le bouton �-�, la température diminue de 1º jusqu'à atteindre 66°F (19°C). REMARQUE : Après 3 secondes, l'affichage indiquera la température réglée.
REMARQUE : Deux piles AA (incluses) alimentent la télécommande. Remplacer les piles après 6 mois d'usage ou lorsque le fonctionnement de la télécommande n'est plus satisfaisant.
26
|
|
|
> |
|