|
|
|
Categories
|
|
Information
|
|
Featured Product
|
|
|
 |
|
|
There are currently no product reviews.
 ;
Thanks for offering this item at such a good price. Proved handy in identifying the part I was looking for my set.
;
Thr Video Recorder i have is quiet Old and the Producer could Not help me. So i w as very glad to find an offer for the owners Manual for a very fair Price.a I obtained the original Manual very quick and I am happy to have it now.
 ;
The PDF copy was immediately available on download after the payment. However, I noticed that the document was in German, and Ihad to contact a German translator to get it translated it to English. The quality of document is legible can be used for my purpose.
;
The manual was complete and of great quality. Originally a tri-lingual file, I first received only one language. After a note to owners-manuals.com, I quickly received the remaining languages... Great service, definitely worth it.
;
Thank you for providing this manual and at low cost.
The Philips scope is of excellent quality, longevity and build and had a couple of faults
when it was passed to me. Having the CCT diagrams is a blessing.
I have fixed the problems and also modded the scope to my requirements.
I have built a 24v Li-Ion pack for portable use from old but good laptop batts.
it is working beautifully and I am well pleased. Keep up the good work Guys.
MODE D�EMPLOI
INSTALLATION DU DISPOSITIF
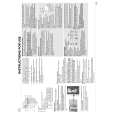
Pour installer le dispositif d'absorption, respecter les recommandations suivantes (il est recommandé de lire tout le paragraphe avant de procéder à l�installation). Le dispositif est fourni avec une enveloppe en plastique renfermant : � 3 enveloppes en aluminium contenant les sachets absorbants. � 1 minuteur à enclencher au moment de l�installation/remplacement des sachets ; il indique les 6 mois qui correspondent à la durée du dispositif. Installation des sachets : � OUVRIR LES ENVELOPPES EN ALUMINIUM (NE PAS UTILISER D'OBJETS COUPANTS) ET SORTIR LES SACHETS ABSORBANTS. � Installer les sachets dans le boîtier comme le montre la fig. 1 : A. Appuyer à l�intérieur des fentes latérales (1) et faire coulisser le couvercle vers le haut (2). B. Dégager le couvercle (3). C. Installer les sachets à l�intérieur du boîtier (en s'assurant que le matériau est réparti de façon uniforme). D. Reposer le couvercle (4). E. Faire glisser le couvercle vers le bas jusqu'à ce qu'il s'enclenche (5). � Installer le boîtier dans le congélateur. � Mettre le congélateur en marche (voir parag. �Installation" dans le Mode d'emploi de l'appareil).
1 2 3 3 1
A
B
C
4 4
5
D Fig. 1
E
|
|
|
> |
|