|
|
|
Categories
|
|
Information
|
|
Featured Product
|
|
|
 |
|
|
There are currently no product reviews.
 ;
Thank´s for your help, I already recived these manual from you
;
Thank you for your manual It has the basic things to and i use the Oszi for Longer Time.
THX
;
Actually, I was looking for this information for 3 years!...now thanks to you, the manual is on my hands and of great help, cause I understand now where I was doing wrong connections and wires...excellent, I'll be back to you if in need, thank you.
 ;
This manual covers the main equipment features only. While it also includes the procedure for saving and loading from the now long obsolete memory cards it does not mention the how to operate with the optional floppy drive interface so I am still at a loss about how to use this! Note that there is a separate manual covering the MIDI interface and programming via the keyboard, not included in this download. You will also need to get hold of this if you want to use the MIDI interface properly. Basically there is little difference between this manual and the free to download manual for the similar PR60 model.
;
Good list of manuals. I found a very rare one and easily get. Should be promptly to download, as we must to wait hours even after confirmed payment.
AKL 414
IT
PRODUCT DESCRIPTION SHEET
OVEN
0 Off First...Last: Runner positions 1. Control panel 2. Upper heating element Oven light
OVEN FUNCTIONS
STATIC FUNCTION
Use when all the food is on the same runner level. - Pre-heat the oven to the required cooking temperature and place the food inside as soon as the red thermostat indicator light switches off. Ideally, the shelf should be on the second runner level when using the static function.
Last
First
3. 4. 5. 6. 7.
Grill element Oven light Fan Lower heating element (not visible) Oven door hinges
STATIC FUNCTION + FAN
Use this function when cooking on two different levels. - Oven pre-heating is not necessary (except for pizzas and focaccia). - Switch the position of the dishes in the oven 10 minutes before the end of cooking time. Remove the cooked dish and, if necessary, continue cooking the other one for as long as required.
8. Oven door
GRILL FUNCTION
Accessories: � Grid � Drip tray Use the grill function to cook small pieces of meat (steaks, sausages) and for making toasts. - The oven door must be closed during the cooking cycle. - Preheat the grill for about 5 minutes. - Arrange the meat on the grid with the drip tray underneath. Pour water in the drip tray to cover the bottom to reduce smoke and fat spatters. - Turn over the meat about half-way through cooking time.
CONTROL PANEL
GRILL FUNCTION + FAN
Ideal for large joints, pork, chicken and roast beef. - The oven door must be closed during the cooking cycle. - Place the meat on the grid with the drip tray underneath. Pour water in the drip tray to cover the bottom to reduce smoke and fat spatters. - Turn over the meat about half-way through cooking time.
DEFROST FUNCTION
Ideal for thawing frozen food to room temperature. - The food should be inserted in the oven in its wrapping to prevent it from drying out.
MECHANICAL ANALOG TIMER
1. Mechanical analog clock 2. Thermostat control knob 3. Functions selector knob 4. Temperature red lamp Important: An optional kit consisting of an oven door glass and of relevant mounting components, is available by the After-Sales Service. The use of the kit reduces the temperature of the outer oven surfacethe house. kids in and is strongly recommended if there are Code N°: 4819 310 39186. Use this electromechanical timer to: 1) View the time of day. To adjust the time, press button (B) and turn it anti-clockwise. 2) Set the cooking start time, which can be delayed by a maximum of 12 hours (e.g. at 7.00 a.m. it�s not possible to delay start of cooking until 8.00 p.m. since cooking would actually start at 8.00 a.m.). 3) Set the cooking duration from a minimum of 5 minutes to a maximum of 180 minutes.
5019 510 53042
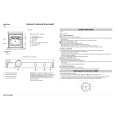 $4.99 AKL414/WH IGNIS
Quick Start Quick start guide ( sometimes called quick guide ) contains most important information on how to use…
|
|
|
> |
|