|
|
|
Categories
|
|
Information
|
|
Featured Product
|
|
|
 |
|
|
There are currently no product reviews.
 ;
Received my manual within 24 hours. Very clear scan of the manual I needed. Thanks!
 ;
Very clear scan, I recommend it. Definitely a must have for any 3362 owner.
Alpine could have written a slightly more complete manual, though. It's already pretty huge, but the unit has so many functions, I feel some more explanation would have been better.
Yamaha's manual of their comparable YDSP-1 is a little better in my opinion.
;
Immediate response with excellent service - highly reccommended
;
Correct manual received and of good quality but the contents of the file for the Service Manual for the same monitor is for a 20" TV not the RGB Monitor.
;
The owners manual for the Pioneer VSX-D603S was exactly what I needed. I received it in a timely manor and it was priced fairly. I definately will use your servise again. Thank You
INSTALLATION Technical information for the installer
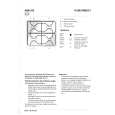
This cooking hob can be embedded in a worktop 20 to 50 mm thick. If another appliance is not fitted under the cooking hob, insert a separator panel, at a distance of at least 20 mm from the cooking hob bottom. Note: before installation, make sure that the local gas delivery conditions (type and pressure of gas) are compatible with the settings of the cooking hob, as indicated on the rating plate. x If a vertical piece of furniture is installed, there must be a gap of at least 100 mm between it and the edge of the cooking hob. x Before installing the cooking hob, remove the plastic film that protects it, if present. The outer surfaces of the furniture or appliances adjoining the cooking hob must be heat resistant (heat protection �Y�, according to local standards).
x x
Installation must comply with current local regulations. In the room where the cooking hob is installed, there must be enough air to allow the gas to burn correctly (see relevant table). The natural flow of air must take place through an adequate opening, that must be: - permanent, made on one of the outside walls of the room, and communicating with the exterior in an area away from sources of pollution; - built so as to ensure that its openings, both on the inside and on the outside, cannot be obstructed, intentionally or accidentally; - protected by a metal grid or mesh that does not reduce its working section; - situated near the floor level and positioned so as not to interfere with the operation of the fume exhaust devices.
x
Assembly
x
Apply the supplied gasket to the cooking hob (unless it has already been fitted), after having cleaned its surface, as shown in figure.
To fix the cooking hob, use brackets supplied with it. 1. Position the brackets on the relevant bores and fix them by means of their screws. 2. Make an opening in the worktop, respecting the dimensions indicated in the enclosed product description sheet. 3. Install the cooking hob in the worktop. Important: the power supply cable and plug must be suitable for the power absorption of the cooking hob, and the cable must be long enough to permit the upward extraction of the cooking hob.
a
56
|
|
|
> |
|