|
|
|
Categories
|
|
Information
|
|
Featured Product
|
|
|
 |
|
|
There are currently no product reviews.
 ;
My first manual from Owner-Manuals.com but not the last! I am very satisfied with the easy ordering and promt delivery of a manual I did not find anywhere else.
 ;
This manual is very helpfull to use the Power Supply. All technical information has been available.
For service use the circuit diagrams are very good.
Thanks .
;
Very comprehensive document which is a must-have for any Satellit 2100 owner whose set up is somewhat intricate. Due to the bad quality of the pictures that are rather dark and a bit blurred I gave 4-star feedback.
;
The manual was missing 2 pages but when I presented the problem to the company they made every attempt to get the 2 pages to me, when they couldn't they refunded my money. A very pleasing and easy transaction. The manual they provided was the original, it was concise and to the point. I plan to do business with this company again when should the need arise.
;
The owners manual is very good. all my how to questions were answered in detail.
ELEKTRISCHER ANSCHLUSS
Elektrischer Anschluss
� Der elektrische Anschluss muss unter Einhaltung der örtlichen Sicherheitsvorschriften vorgenommen werden. � Die Daten über Stromspannung und Stromverbrauch befinden sich auf dem Typenschild. � Die Erdung des Gerätes ist gesetzlich vorgeschrieben. Der Hersteller lehnt jede Haftung für eventuelle Sachschäden oder Verletzungen von Personen und Haustieren ab, die aus der Nichtbeachtung der o.a. Vorschriften entstehen sollten. � Bei der Installation muss ein Netz - Trennschalter mit einer Kontaktöffnungsweite von mindestens 3 mm vorgesehen werden. � Nach der Installation dürfen stromführende Teile nicht mehr zugänglich sein.
Anschluss und Installation
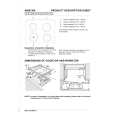
Backofen - Kochmulde 1. Das Gerät in den Backofenunterschrank einschieben und befestigen. 2. Die vier eingelassenen Stecker in die Steckdosen des Herdes stecken . 3. Die Stecker auf richtigen Sitz überprüfen. Achtung: Die Farbkennzeichnung des Steckers muss mit derjenigen der Steckdose übereinstimmen (wei�, schwarz, grün, blau). 4. Den Backofen in den Unterschrank schieben und mit den mitgelieferten Schrauben befestigen. Hinweis: Beim Anschluss an das separate Bedienfeld das letztere nicht mit dem Backofen verbinden; lesen Sie vorher sorgfältig die zum Bedienfeld gehörigen Anleitungen durch.
8
|
|
|
> |
|