|
|
|
Categories
|
|
Information
|
|
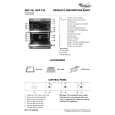
Featured Product
|
|
|
 |
|
|
There are currently no product reviews.
 ;
Having purchased a 1994 Kenwood music system from a Charity shop in 2013 (it was a high end product in its day), I found myself not quite knowing where to plug in what, and how to do this, that and the next thing. I needed a Manual, and after failure with another online 'Manual provider' I found Owner Manuals dot com. Well, I wasn't sure, but it was only $5, and if things didn't work out, I wouldn't have lost much...
But things DID work out. After paying my childrens inheritance money, $4.99, I was sent a Manual for my Kenwood System very quickly. Alas, it was in German, and being Scottish, I could not read it or get my system in order from it...a rapid email to them brought the English Manual in short order, and my retro-system was and IS up and running in it's regulation settings.
I am very grateful to http://www.owner-manuals.com for their quick service and for even having such an obsolete Manual in the first place! If you need a Manual for ANYTHING, try here first. I wouldn't be surprised if I bought a 1928 Marconi radio, and got the user Manual for THAT here too!
Top marks.
John Copeland
Glasgow
Scotland
;
I was so happy that the owner's manual was available. It is well written and helped me to use the radio/CD player/recorder without problems. Thanks for making it available.
Irene Lambert
;
Excellant!!! Very quick and easy....Best $4.99 I have spent in a very long time..
I highly recommend this.
;
Thanks so much for the Owner's manual for my Sony PS - FL1. I had purchased the turntable off of eBay. It came in and looked great. Packed well and appeared to be great. I balanced and aligned the tone are and hooked it up. When trying to play a record the tone are would move to the right place and just before it would drop to play it moved back off the edge of the record before touching down. I searched the net for an answer to this issue. No luck. Then I purchased the owners manual and sure enough there was a place to adjust where the stylus touched down. That adjustment solved the problem and saved me a $35 feet to have the player checked out. The manual is well written and easy to understand. It is a must have for anyone with this front loading Sony turntable.
;
Some years back I pruchased a Sansui G-9000. I had it cleaned up and a problem with the left channel repaired. When I got it back I hooked it up to my tape decks, turn tables, TV and it played great. The only thing I was not really satisfied with was the performance of my Graphic Equalizer. I purchased this owner's manual had poured myself a cup of coffee. The manual is well organized and written in plain language. It also contained the solution to my dissatisfaction. By using the preamp connections coupled I was able to run everything through my graphic equalizer and now enjoy the full potential of my complete system.
3gb66074.fm Page 7 Thursday, March 4, 2004 11:10 AM
CARE AND CLEANING
Important: Do not use water pressure cleaners or steam cleaners. � Clean with a damp cloth. If it is very dirty, add a few drops of washing up detergent to the water. Wipe with a dry cloth. � Do not use corrosive or abrasive detergents, which dull the surface. In the event that one of these products comes into contact with the oven, immediately clean it using a damp cloth. � Slight differences in colour on the front of the appliance are determined by the different materials used, such as glass, plastic and metal.
Exterior of the oven
Accessories
� Soak the accessories in water with washing up detergent immediately after use. .ood residues can be easily removed using a brush or sponge.
Oven cavity
� Do not use abrasive cleaners or pan scourers. Use special oven cleaners and follow the manufacturer's instructions. � After every use, wait for the oven to cool then clean it to prevent the build-up of baked-on food residues. � With long cooking times or when cooking on different levels, especially food with a high water content (pizzas, stuffed vegetables, etc.) condensation may form on the inside of the doors and the seal. When the ovens are cool, dry the inside of the doors with a cloth or sponge. � Clean the glass of the doors with a suitable liquid detergent.
Replacing the bulb
Warning: Disconnect the appliance from the power supply. To remove the side runner frame, push it simultaneously down and towards the centre of the oven (A-fig.1). Then lift the side runner frame upwards to release it from the cavity wall (B-fig.1). Prise off the glass cover C using a screwdriver E. Change the lamp D (fig. 2). Note: use only 25 W/230 V, E-14 type, T300°C bulbs available from After Sales Service. Refit the glass cover, pressing it slightly (fig. 2). To refit the side runner frame, follow the steps above in reverse order. To facilitate cleaning, the oven door can be removed as follows: Hinges . are provided with two movable bolts G. When bolt G is raised, the hinge is released from its housing. Having done this, the door must be lifted upwards and removed, sliding it outwards; hold the sides of the door near the hinges when performing these operations. To refit the door, insert the hinges into their seats and open the door fully. Remember to rotate the two movable bolts G used to hook the two hinges before closing the door (fig. 3). WARNING � Take care not to dislodge the hinge lock system when removing the door as the hinge mechanism has a strong spring system! � Do not immerse the door in water at any time. .ig. 1
Removing the oven doors (for cleaning)
.ig. 2
.ig. 3
7
|
|
|
> |
|