|
|
|
Categories
|
|
Information
|
|
Featured Product
|
|
|
 |
|
|
There are currently no product reviews.
 ;
Excellent printing quality.
A complete and very usefull service manual with all details.
GREAT SERVICE AT VERY LOW PRICE!
A+++++++++++++++++++++++++
;
Excellent printing quality.
A complete and very usefull service manual with all details.
GREAT SERVICE AT VERY LOW PRICE!
A+++++++++++++++++++++++++
;
Excellent printing quality.
A complete and very usefull service manual with all details.
GREAT SERVICE AT VERY LOW PRICE!
A++
;
Complete service manual in excellent quality. I am very satisfied!
;
Complete service manual in excellent quality. I am very satisfied!
AL-1250
3. AE level adjustment (OC mode)
[Input method] When the PHOTO lamp lights up, press and hold the density select key for 5 sec, and the AUTO mode lamp will blink and the adjusted level will be displayed on the exposure level display. [Adjustment] For adjustment, press the density adjustment key too select the density in 5 steps. [Terminating method] Press the density select key, and the model display will turn from blinking to lighting to terminate the AE level adjustment.
4. AE level adjustment (SPF mode)
[Input method] While the SPF mode lamp is lighting, when the PHOTO mode lamp lights up, press and hold the density select key for 5 sec, and the AUTO mode lamp will blink and the adjusted level will be displayed on the exposure level display. [Adjustment] For adjustment, press the density adjustment key to select the density in 5 steps. [Terminating method] When the density select key is pressed, the mode display will turn from blinking to lighting to terminate the AE level adjustment.
5. Toner save mode setup and cancel
[Input method] When the TEST mode lamp lights up, press and hold the density select key for 5 sec, and the PHOTO mode lamp will turn from blinking to lighting and the adjusted level will be displayed on the exposure level display. [Setup/Cancel] Press the left key: Level �1� ON, toner save mode setup Press the right key: Level �5� ON, toner save mode cancel. [Terminating method] When the density select key is pressed, the mode display turns from blinking to lighting to terminate setup.
8-2
 $4.99 AL1220 SHARP
Owner's Manual Complete owner's manual in digital format. The manual will be available for download as PDF file aft…  $4.99 AL-1220 SHARP
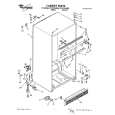
Parts Catalog Parts Catalog only. It's available in PDF format. Useful, if Your equipment is broken and You need t…
|
|
|
> |
|