|
|
|
Categories
|
|
Information
|
|
Featured Product
|
|
|
 |
|
|
There are currently no product reviews.
 ;
THANK YOU FOR A GOOD TRANSACTION, NICE COPY, CLEAR
;
Very Good! All the diagram are easy to read, and its complete.
;
This was an excellent source of detailed assembly information on a device which is at least 12 years old. A very lucky find, coupled with great service.
;
Excellent Service Manual and best price on the Internet. This Service Manual covers everything you could ever need including full circuit schematics, component layout diagrams, stripdown procedure and full parts list/breakdown. I needed this to carry out a modification to one of these headunits and this manual covered everything I needed. Fast delivery, processed within a few hours.
 ;
Thought I would never find a copy of the Technics SX-EN2 Service Manual until I found Owner-Manuals.com. Price was very fair and I received the download promptly. While a photocopy, it is quite readable and includes all the pertinent information and diagrams. Thank you Owner-Manuals!
(8)
Remove the screw, and remove the no. 2 mirror (fθ mirror) (S005/Ua001/P004).
* Cleaning
Use absolute alcohol to clean the No. 1 cylindrical lens (S005/ Ua001/P010).
S005/Ua001/P010/CLN
S005/Ua004/P004/CLN
Use absolute alcohol to clean the scanner mirror (motor) unit, and the laser beam sensor. Clean the whole surface of the scanner mirror (motor) unit as shown in the figure below.
S005/Ua001/P005
* Cleaning
Use absolute alcohol to clean the concave surface of the no. 2 mirror (fθ mirror). (9) Remove the scanner cover. (10) Remove the screw and the connector, and remove the scanner mirror (motor) unit (S005/Ua001/P005).
* Troubles caused by improper work
1) Print image defect (Insufficient print density) (Streaks in the main scanning direction) (Image lack) (E7-03 error) (15) Remove the MCU (PCU) PWB S009/Ua002 . (16) Remove the power PWB unit. S009/Ua001 . (17) Remove the scanner (writing) unit. S005/Ua001 . (18) Remove the screw and the connector, and remove the toner empty sensor (S005/Ua001/P011).
(11) Remove the screw, and remove the laser unit (S005/Ua001/ P006). (12) Remove the connector, and remove the laser beam sensor PWB (S005/Ua001/P007). (13) Remove the screw and the spring, and remove the paper feed solenoid (S005/Ua001/P080). (14) After removing the laser beam sensor PWB, remove the paper empty detector (S005/Ua001/P009) along the boss direction.
S005/Ua001/ P005
9 � 20
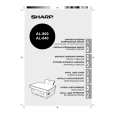 $4.99 AL800 SHARP
Owner's Manual Complete owner's manual in digital format. The manual will be available for download as PDF file aft…
|
|
|
> |
|