|
|
|
Categories
|
|
Information
|
|
Featured Product
|
|
|
 |
|
|
There are currently no product reviews.
 ;
My first manual from Owner-Manuals.com but not the last! I am very satisfied with the easy ordering and promt delivery of a manual I did not find anywhere else.
 ;
This manual is very helpfull to use the Power Supply. All technical information has been available.
For service use the circuit diagrams are very good.
Thanks .
;
Very comprehensive document which is a must-have for any Satellit 2100 owner whose set up is somewhat intricate. Due to the bad quality of the pictures that are rather dark and a bit blurred I gave 4-star feedback.
;
The manual was missing 2 pages but when I presented the problem to the company they made every attempt to get the 2 pages to me, when they couldn't they refunded my money. A very pleasing and easy transaction. The manual they provided was the original, it was concise and to the point. I plan to do business with this company again when should the need arise.
;
The owners manual is very good. all my how to questions were answered in detail.
Care and Cleaning
Removing Oven Door
3. Gently lower the door so that the bottom of the hinge arm rests on the bottom of the opening. 4. Open the door to the fully opened position. 5. Replace the retaining brackets and screw(s) on each side of the oven door. 6. Close the oven door completely. If the door does not line up with the oven frame, remove the door and repeat the above steps. Hinge Type 2 1. Open the door to the fully opened position. 2. Pull up the lock located on each hinge support and engage it in the hook of the hinge lever. You may have to apply a little downward pressure on the door to pull the locks fully over the hooks. 3. Grasp the door by the sides, pull the bottom of the door up and toward you to disengage the hinge supports. 4. Keep pulling the bottom of the door toward you while rotating the top of the door toward the appliance to completely disengage the hinge levers. 5. To reinstall the oven door, reverse steps 1 through 4. Make sure the hinge supports are fully engaged before unlocking the hinge levers
! CAUTION
To avoid risk of personal injury or door damage, lay the door flat with the inside of the door facing down for safe, temporary storage. The door is heavy. Hinge Type 1 1. Open the door to the fully opened position. 2. Remove the screws (A) on each side of the oven door. (See Figure 11.)
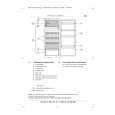
Figure 11
3. Remove the brackets. 4. Close the door about 3/4 of the way to the quarteropen position. Grasp the door firmly on both sides and lift up about 1/2 inch, then swing the lower end away from the wall oven. 5. To clean oven door, see the cleaning chart in �Care and Cleaning� section. Reinstalling Oven Door (Hinge Type 1) 1. Grasp the door firmly on both sides. 2. Place top of the hinge arm against the top of the opening (B in Figure 12) in the oven frame. Press the bottom of the door in until the hinge is all the way into the opening. .
Figure 13�Hinge Type 2
Figure 12
16
|
|
|
> |
|