|
|
|
Categories
|
|
Information
|
|
Featured Product
|
|
|
 |
|
|
There are currently no product reviews.
 ;
I received a good service manual, with good resolution. Improve the instructions for the purchase because they are not well understood.
For the rest, so good.
Thanks Angel.
;
Very good documentation for the Grundig 2077 model (as well as similar 800/900/1000 series radios). The first two pages are a summary of reception specifications and output capability. The third page is the tuner dial indicator and dial cord routing diagram. the final ~5 pages are the schematics for the various models (including 2077). The scan quality of the schematics are good, adn can be easily read if zoomed in. The documents are in German, not English as stated. It would have been nice to have the tuning sequence and settings, and some trouble shooting materials... or component and wiring map.
 ;
Perfect like it was descriped, Perfect like it was descriped
;
Very good detail, all pages clear, exactly what I needed
;
Excellent service, and just what I needed to service my TU-7700. All pages of the manual are clear and easily readable.
6) Attach the developer tank to the developer cartridge. * After supplying developer into the developer cartridge, do not tilt or shake the developer cartridge. 7) Attach the developer cartridge to the copier, and fix it with the screw.
4. Removal and storage of fixing screw
1) Lift the knob and gently pull out the tray.
B. Toner cartridge installation
1) Shake the toner cartridge several times horizontally, and remove the tape. * Do not hold the shutter lever when shaking. * After removing the tape, do not tilt or shake the toner cartridge.
4 or 5 times
2) Hold the paper pressure plate and turn the fixing screw in the arrow direction.
Shutter Tape
2) Attach the toner cartridge to the copier. 3) Store the fixing pin and the fixing screw in the tray. � Store the fixing screw which was removed in the above procedure 2 and the fixing screw which was removed in procedure 2 of 2.
�
Removal of protective material and fixing screw in the storage place in the tray.
3) Pull the shutter lever.
Pressure plate lock
Screw
Close the front cover A, then close the side cover B. � When closing the front cover, gently press the both sides. � When closing the side cover, hold the knob.
�
When closing the covers, be sure to close the front cover first, then close the side cover. If closed in a wrong sequence, the covers may be broken.
B
A
AR-162 UNPACKING AND INSTALLATION � 2
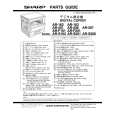 $4.99 AR-F201 SHARP
Parts Catalog Parts Catalog only. It's available in PDF format. Useful, if Your equipment is broken and You need t…
|
|
|
> |
|