|
|
|
Categories
|
|
Information
|
|
Featured Product
|
|
|
 |
|
|
There are currently no product reviews.
 ;
Good quality service manual.It has helped me to fix my FV1800,particularly for replacing the dial cord.The scheme is on A3 format and very readable.Thank.Olivier.
;
This manual is complete and very readable.It was a great help for my two ICF5800L.The first one had the dial cord broken,and without the service manual it is impossible to replace it.Thank.Olivier.
 ;
This is a top quality manual. You couldn't get better if you had the original and scanned it yourself. Best price on the net as well. Diagrams are clear and complete, text is sharp and easy to read. Granted you don't get the manual the second you click pay, but the few hours you have to wait for it to be available for download isn't a problem at all. This is a very reliable company.
Very VERY pleased with the product, and will buy others. Thanks!
;
In a word AWESOME.
I never expected the quality and abundant content that I got with this manual. Everything you'd ever want to know from a service perspective is found in this manual, along with... as a bonus, operating instructions on how to use the unit. WOW. Very impressed with the quality of the manual. You won't be disappointed if you're looking for the EVS900 service manual.
;
I thank Owen-Manuals.com for the wonderful service rendered to me, and this manual which I purchased helped me a lot in servicing my Denon System, which was lying in a dead state.
Thanks Owner-Manual.com
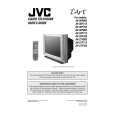
AV-27F703 AV-27F713 AV-27F803
SPECIFIC SERVICE INSTRUCTIONS
DISASSEMBLY PROCEDURE
REMOVING THE REAR COVER
1. Disc onnect the power plug from wall outlet. 2. As s hown in the Fig.1, remove the 12 screws marked !. 3. Withdraw the rear c over backward.
CHECKING THE CHASSIS
To check the PW Board from back side. 1. Pull out the chassis (refer to REMOVING THE CHASSIS). 2. Erect the chas sis vertically so that you c an easily check the back side of the PW Board.
REMOVING THE TERMINAL BOARD
" After removing the rear c over. 1. As s hown in Fig.1, remove the screws marked 2. Withdraw the terminal board toward you.
[CAUTION]
".
" When erecting the chassis, be careful so that there will be no contacting with other PW Board. " Before turning on power, make s ure that the wire connec tor is properly connec ted. " When conducting a check with power supplied, be sure to confirm that the CRT EARTH WIRE (BRAIDED ASS�Y) is connected to the CRT SOCKET PW boar d.
REMOVING THE CHASSIS
" After removing the rear c over / terminal board. 1. Slightly raise the both sides of chassis by hand and remove the
2 claws under the both side of the chassis from the front cabinet.
2. Withdraw the chass is backward. (If necess ary, remove the wire clamp, c onnectors etc.)
WIRE CLAMPING AND CABLE TYING
1. Be sure to clamp the wire. 2. Never remove the c able tie used for tying the wires together. Should it be inadvertently removed, be sure to tie the wires with a new cable tie.
REMOVING THE SPEAKER
" After removing the rear cover. 1. As shown in Fig. 1, removing the
4
screws marked
#,
then
remove the speaker. 2. Follow the s ame steps when removing the other hand speak er. NOTE : When removing the upper one.
4
screws mark ed
#
of the speaker,
remove the lower side screw first, and then remove the
REMOVING THE LED & POWER SW PWB
" After removing the rear c over & terminal board. 1. Remove the 2 screws marked $ as s hown in Fig.1. 2. Withdraw the LED & POWER SW PWB toward you. * If nec essary, remove the wire c lamp, connector etc.
REMOVING THE FRONT CONTROL PWB
" After removing the rear c over & terminal board. 1. Remove the 2 screws marked % as s hown in Fig.1. 2. Withdraw the FRONT CONTROL PWB toward you. * If nec essary, remove the wire c lamp, connector etc.
8
No.52005
|
|
|
> |
|