|
|
|
Categories
|
|
Information
|
|
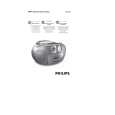
Featured Product
|
|
|
 |
|
|
There are currently no product reviews.
 ;
Manual found fast and good quality, very helpfull service
;
8-17-12 Been using the sight for about 6 months. Fast Downloads and top quality
Manuels !
 ;
Everything was great, the manual, the response time, the simplicity of the order, and the
Price. The only thing that I could possible say on a negative note would be that the manual I ordered was more for a service tech. There were a lot of schematic diagrams that didn't help me solve the problem. However I would order again and recommend the web sight to others.
;
I'd been looking for this manual for awhile. Exactly what I needed - and at an excellant price. Thanks!
;
very complete. acceptable resolution. details are a little unclear. is a manual note 8.
AV28BH7ENS / AV28BH7ENB AV28BH7EPS / AV28BH7EPB AV28BH7EES / AV28BH7EEB
SPECIFIC SERVICE INSTRUCTIONS
DISASSEMBLY PROCEDURE
REMOVING THE REAR COVER
1. Remove the 8 screws marked A. 2. Remove the 4 screws marked B. 3. Withdraw the rear cover toward you.
REMOVING THE MAIN PWB
" After removing the rear cover . 1. Draw out back and remove the MAIN PWB ASS�Y, NOTES Be careful enough when developing a main c hassis. The wire of a POWER TRANSFER does not separate and short-circuit with other parts.
REMOVING THE FRONT AV + HEADPHONE JACK PWB
" After removing the rear cover. 1. Remove the 2 screws marked C, and remove the FRONT AV + HEADPHONE JACK PW B.
REMOVING THE FRONT CONTROL PWB
" After removing the rear cover. 1. Remove the MAIN PW B ASS�Y. 2. Remove the 5 screws marked D, and remove the FRONT CONTROL PW B.
REMOVING THE SPEAKER
" 1. 2. 3. After removing the rear cover. Remove the 4 screws marked E, and remove the SPEAKER. Remove the 2 screws marked F, and remove the TWEETER SPEAKER. Remove an oppos ite side similarly.
6
No.51967
|
|
|
> |
|