|
|
|
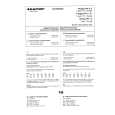
Categories
|
|
Information
|
|
Featured Product
|
|
|
 |
|
|
There are currently no product reviews.
 ;
Quick site processing. A complete and very useful manual with all details. Thank you!
;
Quick service response. A useful and very rare service manual with all details. I recomend this service.
;
I ordered this manual sometime in the afternoon and I received it on my e-mail the same evening.
This is a fantastically good and properly scanned copy of the original manual. All pages are of the same scale and they overlap each other. It means that you can print the manual and easily make it as a convenient paper manual.
The content of the manual is fantastic. Alignment descriptions, PCB layouts and elementary diagrams are explicit and precise. I immediately found what I was looking for. Thanks to this manual and Owner-Manuals.com my amplifier is alive again. Many thanx indded!
;
The manual was well-scanned and easy to read. As an added bonus, the Operator's Manual was bundled with the Service Manual!
I'd definitely use owner-manuals.com again.
;
Finally, i found one website, where i can download this service manual , and fix my hifi. The service manual is very good, and easy to download and to print.
AV-32X37SUE AV-32X37HKE AV-32X37HIE AV-32X35HUE AV-32X35HKE AV-32H35SUE 2.4 REPLACEMENT OF MEMORY IC 2.4.1 MEMORY IC This TV use memory IC. In the memory IC, there are memorized data for correctly operating the video and deflection circuits. When replacing memory IC, be sure to use IC written with the initial values of data.
2.4.2 PROCEDURE FOR REPLACING MEMORY IC PROCEDURE
SERVICE MENU
1. Power off Switch the power off and unplug the power cord from the outlet
1. IF
2. V/C
3. AUDIO 4. DEF 5. VSM PRESET 6. STATUS 7. 8. SURROUND 9. SHIPPING (OFF) 0. BUS FREE 1-9 : SELECT i : EXIT
2. Replace IC. Be sure to use memory IC written with the initial data values.
Fig.1 3. Power on Plug the power cord into the outlet and switch the power on.
SYSTEM CONSTANT SET 1. DESTINATION EU
4. Check and set SYSTEM CONSTANT SET: * It must not adjust without signal. (1) Press the [INFORMATION] key and the [MUTING] key of the REMOTE CONTROL UNIT simultaneously. (2) The SERVICE MENU screen of Fig. 1 will be displayed. (3) While the SERVICE MENU is displayed, press the INFORMATION key and [MUTING] key simultaneously, and the SYSTEM CONSTANT SET screen of Fig. 2 will be displayed. (4) Check the setting values of the SYSTEM CONSTANT SET of Table 1. If the value is different, select the setting item with the [FUNCTION UP/DOWN] key, and set the correct value with the [FUNCTION -/+] key. (5) Press the [MENU] key to memorize the setting value. (6) Press the [INFORMATION] key twice, and return to the normal screen.
- /+
OK
: STORE
i : EXIT
Fig.2
NAME OF REMOTE CONTROL KEY
Names of key key
INFORMATION MUTING
MENU
OK
FUNCTION UP/DOWN
5. Setting of receive channels Set the receive channel. For setting, refer to the OPERATING INSTRUCTIONS.
FUNCTION -/+
6. User settings Check the user setting values of Table 2, and if setting value is different, set the correct value. For setting, refer to the OPERATING INSTRUCTIONS.
7. Setting of SERVICE MENU Verify the setting items of the SERVICE MENU of Table 3, and reset where necessary. For setting, refer to the ADJUSTMENT.
1-10 (No.52107)
|
|
|
> |
|