|
There are currently no product reviews.
 ;
perfect! you just sent to me the copy in Italian witout even my specification!!!! so you are really smart cooperative and efficient. To my opinion the best place all over to get a manual of electronics!!!!
;
Well Well Well!!!! Good manual perfect for my hobby!!! As Before you have done a very well done work!!!! Thank you
;
Super nice! Good to have a manual in digital format.
;
Great job supplying the manual.
Many of these products weerepretty obscure, so it was great that you had
the manual for it!
;
Great manual, would not have been able to operate my machine without it!!
James Dawson August 18, 2012
05099-gb.fm5 Page 132 Wednesday, January 3, 2001 3:12 PM
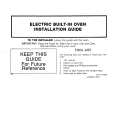
INSTALLATION
Remove the transit bolts 1. Slacken the four bolts with the spanner supplied. 2. Unscrew the bolts by hand. 3. Holding the bolt head, pull each bolt through the wide part of the holes. 4. Close the holes with the plastic covers supplied; insert the covers in the wide part of the hole and slide them toward the narrow part until they click into place. 5. Keep the transit bolts for future use. � Whenever the appliance is transported, the transit bolts must be refitted: 1. Pry off the plastic covers with a screwdriver, slide them in the opposite direction of the arrow and remove. 2. Insert the transit bolts, performing the steps for removal in reverse order.
Adjust the feet If the floor is uneven, adjust the levelling feet as required (do not insert pieces of wood etc. under the feet): 1. Slacken the locknut using the spanner supplied. 2. Adjust the height of the foot, turning it by hand. 3. Tighten the locknut by turning it anti-clockwise towards the appliance casing. If the appliance is to be installed on a wooden floor, distribute the weight by placing it on a 60 x 60 cm sheet of plywood at least 3 cm in thickness. Secure the plywood sheet to the floor.
132
Black Process Plate
|