|
|
|
Categories
|
|
Information
|
|
Featured Product
|
|
|
 |
|
|
There are currently no product reviews.
 ;
Everything is OK. Owner's Manual I downloaded ( I get link for it by email).
;
The only reason I gave this less than 4 stars, is because it shouldn't take 24 hrs to have the download available. I was surprised to find that I had to wait until the next day to be able to download the manual that I paid for.
The manual itself is the correct manual.
 ;
Excellent replacement for original Owner´s Manual. I am totally satisfied!
;
Great service. Manual is as advertised and delivered when promised.
;
Perfect quality, highly appreciated service !!!
Fast delivery of the download info, no issues at all. Recommended E-manual shop !!!
30110447GB.fm Page 7 Thursday, May 10, 2007 12:35 PM
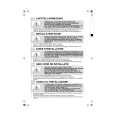
REMOVING THE FILTER
We recommend that you check and clean the filter regularly, at least two or three times a year.
Especially:
� when the appliance does not drain or spin properly. � If the �Clean pump� indication lights up. IMPORTANT: Make sure the washing water has had time to cool before draining the appliance. 1. Switch off the appliance and unplug it. 2. Remove the plinth. 3. Place a container beneath it. 4. Pull out the hose �A� and remove the cap from the hose, so that the water can flow into the container beneath. 5. As soon as no more water flows out of the hose, slowly turn the filter �B� anticlockwise without opening it completely. 6. Open the filter but do not withdraw it completely. Slowly turn the handle anticlockwise until the water drains out. 7. Wait until all the water has drained off. 8. Now unscrew the filter completely and remove it. 9. Clean the filter and the filter chamber. 10. Check that the pump rotor still moves freely. 11. Insert the filter with the guide pin upwards and screw it in clockwise to the stop (handle horizontal). 12. Close hose �A� with the cap and push it completely back into the machine. 13. Pour about 1 litre of water into the detergent drawer to reactivate the Eco system. Check that the filter is seated properly and tightly in place. 14. Fit the plinth again. 15. Reinsert the plug in the socket.
B
A
DRAINING RESIDUAL WATER
When should the residual water be removed?
� To transport the machine (relocation). � In a frost-endangered room. In this case, it is recommended that the machine be emptied after each wash cycle.
Before emptying the residual water, switch the appliance off and unplug it from the mains socket.
1. Remove the plinth cover. 2. Grasp the cap and pull out together with the hose. Place a low container beneath it. Pull off cap from end of hose. 3. Drain the water into a low container until no more water flows out. Then close the residual water drain hose and insert it again.
Before using the washing machine again:
1. Pour approx. 1 litre of water into the detergent drawer to reactivate the Eco system. 2. Reinsert the plug in the socket.
GB 7
Black process 45.0° 100.0 LPI
|
|
|
> |
|