|
|
|
Categories
|
|
Information
|
|
Featured Product
|
|
|
 |
|
|
There are currently no product reviews.
 ;
Found website easy to use and manual very clear. First class service
 ;
The quality is quite good and clear. Nothing of the informations inside is lost during the digitalizing process
;
Very good service, fast downloads and good manuals.
;
Good qulity. Even as it is an old manual (from 1991-1992) it has a good scanned quality and is complete, including user's manual, disassembly intructions, diagrams and schematics, ajustments, troubleshooting and parts list, as usual with SONY manuals and Owner-manuals service.
;
tres bon document
cela a permis de verifier la connection de l'ecran
merci
salutations
3-2
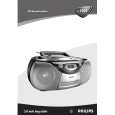
CONNECTIONS AND CONTROLS Power Supply
Whenever convenient, use the mains supply cord if you want to conserve battery life. Make sure you remove the plug from the set and wall outlet before inserting batteries. Batteries (not included) Open the battery compartment and insert six batteries, type R14, UM-2 or C-cells, (preferably alkaline) with the correct polarity as indicated by the "+" and "�" symbols inside the compartment. (See 1) Replace the compartment door, making sure the batteries are firmly and correctly in place. The set is now ready to operate. Batteries contain chemical substances, so they should be disposed of properly. Incorrect use of batteries can cause electrolyte leakage and will corrode the compartment or cause the batteries to burst: Do not mix battery types: e.g. alkaline with carbon zinc. Only use batteries of the same type for the set. When inserting new batteries, do not try to mix old batteries with the new ones. Remove the batteries if the set is not to be used for a long time. Using AC Mains Check if the power/mains voltage, as shown on the type plate located on the bottom of the set, corresponds to your local power supply. If it does not, consult your dealer or service center. Connect the power cord to the AC POWER/MAINS inlet and the wall socket. The mains lead is now connected and ready for use. To switch the set off completely, withdraw the power cord from the wall socket. Disconnect the mains lead from the wall socket to protect your set during heavy thunderstorms. The type plate is located on the bottom of the set. Switching POWER on/off: Save energy To avoid unnecessary energy consumption, always adjust the source selector to TAPE/POWER OFF after using the set. Also check that the tape deck keys are released.
General operation
1 To select your sound source adjust the source selector to : CD, TUNER or TAPE/POWER OFF. 2 Adjust the sound with the VOLUME control. 3 To switch off the set, adjust the source selector to TAPE/POWER OFF position and check the cassette keys are released.
Trouble shooting
Problem � Possible cause � Remedy No sound /power � � � � � � Volume not adjusted Adjust the VOLUME Power cord not securely connected Connect the AC power cord properly Batteries dead/ incorrectly inserted Insert (fresh) batteries correctly
Display does not function properly/ No reaction to operation of any of the controls � Electrostatic discharge � Switch off and unplug the set. Reconnect after a few seconds The CD skips tracks � � � � � � � � CD damaged or dirty Replace or clean CD Program is active Quit program mode No CD inserted Insert a CD CD badly scratched or dirty Replace/ clean CD, see Maintenance
-- indication
� Laser lens steamed up � Wait until lens has cleared � CD-R is blank or not finalized/ CD-RW inserted � Use a finalized CD-R or suitable CD Audio disc only Poor cassette sound quality � Dust and dirt on the heads, etc. � Clean deck parts, see Maintenance � Use of incompatible cassette types (METAL or CHROME) � Only use NORMAL (IEC I) for recording Recording does not work � Cassette tab(s) may be broken � Apply adhesive tape over the missing tab space
For more information on operation instruction please visit Philips Audio internet site : http://www.audio.philips.com
|
|
|
> |
|