|
|
|
Categories
|
|
Information
|
|
Featured Product
|
|
|
 |
|
|
There are currently no product reviews.
 ;
Very satisfied with received document, all is right, Thank You very much, it was a Pleasure to work with You.
 ;
great site, the most easy and fastest way to find the manual you need, no 5 star because the manual was only available in german, but I speak german as well so no problem for me.
;
thanks for this download i got a pioneer bdp-lx70a blu-ray player and it had no manual i search everywhere on the internet and came across owner-manuals.com and i found that it was so easy to find and downloaded from this site if i ever need a manual again this would be the first place that i would come too thanks guys
;
Superb! It's the original manual. We can now use our old calculator with its full function.
;
This is a very well written and comprehensive manual. It answered all our queries.
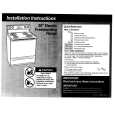
Installing the Washing Machine
SELECTING A LOCATION
Before you install the washing machine, select a location with the following characteristics: � A hard, level surface (if the surface is uneven, see "Adjusting the leveling feet," below) � Away from direct sunlight. � Adequate ventilation � Room temperature that will not fall below 0 �C � Away from sources of heat such as coal or gas Make sure that the washing machine does not stand on its power cord. Ventilation openings must not be obstructed by carpeting when the washing machine is installed on a carpeted floor.
ADJUSTING THE LEVELING FEET
If the floor is uneven, adjust the feet (do not insert pieces of wood or any other objects under the feet): 1. Loosen the leg bolt by turning it with your hand until it is at the desired height. 2. Tighten the locking nut by turning it with the supplied wrench.
�Place the washer on a sturdy, flat surface. If the washer is placed on an uneven or weak surface, noise or vibration occurs. (Only a l degree angle is allowed.)
REMOVING THE TRANSIT BOLTS
Before using the washing machine, you must remove the five transit bolts from the back of the unit. To remove the bolts: 1. Loosen all bolts with the supplied wrench before removing them. 2. Take each bolt head and plastic together, pull it through the wide part of the hole. Repeat for each bolt. 3. Fill the holes with the supplied plastic covers. 4. Keep the transit bolts for future use.
CONNECTING THE WATER SUPPLY HOSE
The water supply hose must be connected to the washing machine at one end and to the water faucet at the other. Do not stretch the water supply hose. If the hose is too short and you do not wish to move the water faucet, replace the hose with a longer, high pressure hose. To connect the water supply hose: 1. Take the L-shaped arm fitting for the cold water supply hose and connect to the cold water supply intake on the back of the machine. Tighten by hand.
MC-Service
SAMSUNG Washing Machine Owner�s Instructions 5
|
|
|
> |
|