|
|
|
Categories
|
|
Information
|
|
Featured Product
|
|
|
 |
|
|
There are currently no product reviews.
 ;
Perfect quality, highly appreciated service !!!
Fast delivery of the download info, no issues at all. Recommended E-manual shop !!!
;
hi owners manual- crew,
i am very satisfied about the trade with you.
if i need some other manuals, i will contact you again.
thanks
frank kappler
;
Full Panasonic service Manual, as described, no problems
;
This place is amazing. Got our manual in a few hours. Print quality is excellent. Even the manufacturer didn't have this manual. The price was excellent. How many more stars can I give them? More than satisfied.
;
This was a very hard to find manual. The unit is long discontinued and Pioneer doesn't retain every manual for every model. Thanks owner's-manual.com!
Care and Cleaning
Be sure all controls are OFF and all cooktop parts are cool before cleaning�
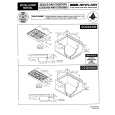
I_Remove knobs in the OFF position by pulling each knob straight up. Never pry off with a metal blade. � Wash in dishwasher or in warm, soapy water. Do not soak or use abrasive cleaners such as steel wool pads. Rinse and dry. � Replace knobs, matching the flat part of the knob opening with the flat part of the shaft. Make sure knobs are in the OFF position. Never hit the knob on the shaft with your hand or an_ other object when replacing. NOTE: When knobs are removed for cleaning, be careful not to spill liquids through the hole, in the control area. � Wipe with a clean, damp sponge or cloth. Rinse and dry thoroughly to prevent a filmy residu_ A glass cleaner or mild liquid spray may be used to remove smudge marks and stains. Do n( use abrasive cleansers or S.O.S. pads. � Use mild liquid sprays, wipe with damp cloth or sponge. Rinse and dry. Polish with glass cleaner if necessary. � Clean with a toothbrush and warm soapy water. Rinse anddry thoroughly. DO NOT STRIKE or PRY the ignitor. (Refer to illustration of surface burner head on the following page for location of ignitors.) Never wipe a warm or hot porcelain enamel surface with a damp cloth. For general cleaning, wipe with soapy cloth, rinse and dry. To remove grease, spray with cleaners suc[ as Fantastik or 409*. DO NOT use abrasive cleaning agents. They may damage the surface. For stubborn soils clean with Cooktop Cleaning Creme (Part#20000001). NOTE: The porcelain enamel used on your cooktop is acid resistant, not acid proof. Therefore, acid foods (such as vinegar, tomato, milk, etc.) spilled on the cooktop should be wiped up immediately with a dry cloth. � Wash grates with warm, soapy water and a nonabrasive, plastic, scrubbing pad or in the dishwasher. For stubborn soils, clean with a soap-filled, nonabrasive, plastic pad or Cooktop Cleaning Creme* (Part # 20000001) and a sponge. � The grates are made of porcelain on cast iron and are very durable, however, they will gradually lose their shine and/or discolor. This is due to exposure to high temperatures from the gas flame. � When replacing the grates, place the rear grate on the cooktop with the grate guide toward the front. Then, add the front grate by positioning the grate guide under the rear grate and lowering onto the cooktop.
... Ill(
_'_//_]
_ _ _,__
:_2,_
|
|
|
> |
|