|
|
|
Categories
|
|
Information
|
|
Featured Product
|
|
|
 |
|
|
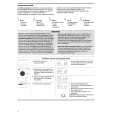
There are currently no product reviews.
 ;
Excellent printing quality.
A complete and very usefull service manual with all details.
GREAT SERVICE AT VERY LOW PRICE!
A+++++++++++++++++++++++++
 ;
manual excelente completo , diagramas y esquemas bien presentados y buena calidad de imagen.
;
muy buen manual completo de buena calidad de impresion preciso y detallado , muy útil para la reparación.
;
The service manual is a good quality scan of the Panasonic NV-850, which is electrically identical to the Philips VR 6920, but mecanically just nearly.
;
The service manual is a good quality scan of the Blaupunkt RTV-404, which is electrically and mecanically identical to the Panasonic NV-830.
11. TRAY MECHANISM ADJUSTMENTS
1. When mounting tray and tray case (when replacing tray case because of damage etc.) a) When the tray has been positioned improperly with a deviated clearance to the front panel window, re-move the tray lid, loosen screws A and adjust by moving the tray frame within the range of the holes play. 2.When the tray Is disengaged to the lower side 3.When replacing the sub-chassis (VAM1252) a) The height of the sub-chassis turn table is different one by one. Adjust each turn table height so that the magnet clamper does not touch the clamper metal strap as shown in the figure. Standard ( 1.5+0.3 / -0 mm) 4.Others a) For the loading wire winding, refer to the figure be-low. Wind from inside to outside (1 2 3).
Tray
A
1.5 ±
When the tray is pushed downward without the sub-chassis (VAM1252), it will be disengaged. So care will be necessary.
Tray lid Retainer
0.3 0
mm
Clamper metal strap
Tray
DISC
A Tray case
Wind form inside to outside 1
(Closing the tray without the sub-chassis also disengages the tray.) Mount the tray referring to the figures below.
Clamper metal Strap height adjustment screw
2
3
A Tray lid Glass
b) When the magnet clamper (094M) is replaced, bent the narrowest tab and remove the clamper. Bend the narrowest tab.
a) Bring down the lever and put the tray on the protrusion of lever.
For the tray tilt adjustment. refer to the figure below.
Tray
Lever
Tray case
a
Mechanism chassis
b
b) While holding the tray, bring down the opposite lever and put the tray on the protrusion of the lever. b) After replacing the sub-chassis, readjust so that the magnet clamper does not touch the clamper metal strap at right and left sides. (The clamper metal strap should not be touched to other straps.)
Protrusion
Bend the narrowest tab
a = b = 29.0 ± 0.2 a - b ±0.2
Front side
Adjust the tilt with screws A. b) The operating power of the tray is set to 250 - 350gr (Power OFF). Note : If both the levers are brought down at the same time, the tray cannot be raised. The levers should be brought down one by one. If the tray is forced to move to the original position, the two
250 ~ 350gr
Clamper arm adjustment screw
Clamper arm Clamper
pins injected into the tray case may be bent.
33
34
|
|
|
> |
|