|
|
|
Categories
|
|
Information
|
|
Featured Product
|
|
|
 |
|
|
There are currently no product reviews.
 ;
Very good manual. Plenty of service information including alignment instructions. Clear circuit diagram. Excellent, thank you.
 ;
Good morning, the service manual you sent me was perfect.
Your service and answering are excellent.
I recomend this service.
Best regards.
;
I had been looking everywhere for a proper service manual for this VCR. Everywhere else that has this available for download has a very light version. This is the full service manual with all aspects that would interest anyone looking for the service manual for the AIWA HV-MX100 Worldwide VHS VCR. Great quality (as always). A winner hands down. Best Quality.
;
Top quality manual. Covers all aspects you'd expect in a top quality service manual for this Panasonic VHS VCR. The manual resolution is high. Another top quality manual from the only site worth downloading manuals from! If you're looking for a manual for the PV-9662 VHS VCR, this is the one you'll want to get!
;
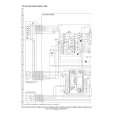
complete part-lists and pcb layout, schematic diagram is good enlargable,
CD-BP160W/180W/1500W/1700W
CD-BP160W/180W/1500W/1700W
s Remote control
1
11. 12. 13. 14. 15. 16. 17. 3 3 18. 19. 3 3 10. 11. 12. 13. 3 3 14. 15. 16. 17.
Remote Control Transmitter LED (CD) Disc Skip Button (CD) Clear Button (CD) Memory Button (CD) Random Button (TAPE 2) Record Pause Button (CD) Track Down/Review Button (TUNER) Preset Down Button (TAPE 2) Fast Wind Button (CD) Pause Button (CD) Track Up/Cue Button (TUNER) Preset Up Button (TAPE 2) Fast Wind Button Equalizer Mode Selector Button (TAPE 2) Reverse Play Button (CD/TAPE) Stop Button (CD) Play/Repeat Button (TAPE 1) Play Button (TAPE 2) Forward Play Button Function Selector Buttons On/Stand-by Button Extra Bass Button Volume Up/Down Buttons
2 345 6 7 89
10 1112 13 14 15 16 17
OPERATION MANUAL
RESETTING THE MICROCOMPUTER
X-BASS/ DEMO ON/ STAND-BY
Reset the microcomputer under the following conditions: q To erase all of the stored memory contents (clock and timer settings, and tuner and CD presets). q If the display is not correct. q If the operation is not correct.
1 2
Press the ON/STAND-BY button to enter the stand-by mode. Whilst pressing down the button and the X-BASS/DEMO button, hold down the ON/STAND-BY button for at least 1 second.
q "CLEAR AL" will appear. Caution: q The operation explained above will erase all data stored in memory including clock and timer settings, and tuner and CD presets.
s Remote control
Notes concerning use: q Replace the batteries if the operating distance is reduced or if the operation becomes erratic. q Periodically clean the transmitter LED on the remote control and the sensor on the main unit with a soft cloth. q Exposing the sensor on the main unit to strong light may interfere with operation. Change the lighting or the direction of the unit. q Keep the remote control away from moisture, excessive heat, shock, and vibrations.
0.2 m - 6 m (8" - 20')
15
15
�6�
|
|
|
> |
|