|
|
|
Categories
|
|
Information
|
|
Featured Product
|
|
|
 |
|
|
There are currently no product reviews.
 ;
A very good complete archive, i am very satisfied for document.
 ;
The Service Manual received was helpful. The electronic information is exactly what I needed.
;
The Manual was perfect.
The deliverie was perfect.
Thanks
;
Found website easy to use and manual very clear. First class service
;
The quality is quite good and clear. Nothing of the informations inside is lost during the digitalizing process
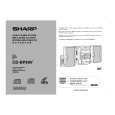
CD-BK110V/CD-BP99V
Setting the Clock (For CD-BK110V)
4
Press the TUNING/TIME ( or ) button to adjust the hour and then press the MEMORY/SET button.
Press the TUNING/TIME ( or ) button once to advance the time by 1 hour. Hold it down to advance continuously. When the 12-hour display is selected, "AM" will change automatically to "PM".
5
In this example, the clock is set for the 24-hour (0:00) display.
Press the TUNING/TIME ( or ) button to adjust the minutes and then press the MEMORY/SET button.
1 2
Press the ON/STAND-BY button to turn the power on. Press the CLOCK button and within 5 seconds, press the MEMORY/ SET button.
Press the TUNING/TIME ( or ) button once to advance the time by 1 minute. Hold it down to change the time in 5-minute intervals. The hour will not advance even if minutes advance from "59" to "00". The clock begins counting from "0" seconds. (Seconds are not displayed.) The time display will disappear after a few seconds.
To confirm the time display:
3
Press the TUNING/TIME ( or ) button to select 24-hour or 12-hour display and then press the MEMORY/SET button.
Press the CLOCK button. The time display will appear for about 5 seconds.
Note:
The "CLOCK" or time will flash at the push of the CLOCK button when the AC power supply is restored after a power failure or unplugging the unit. Readjust the clock as follows. "0:00" "AM 12:00" "AM 0:00" The 24-hour display will appear. (0:00 - 23:59) The 12-hour display will appear. (AM 12:00 - PM 11:59) The 12-hour display will appear. (AM 0:00 - PM 11:59)
To readjust the clock:
Perform "Setting the Clock" from the beginning. If the time display is flashing, step 3 (for selecting the 24-hour or 12-hour display) will be skipped.
To change the 24-hour or 12-hour display:
1 2 Clear all the programmed contents. [Refer to "Clearing all the memory (reset)".] Perform "Setting the Clock" from the beginning.
Note that this can only be set when the unit is first installed or it has been reset. [Refer to "Clearing all the memory (reset)".]
Setting the Clock (For CD-BP99V)
4
Press the TUNING/TIME ( or ) button to adjust the hour and then press the MEMORY/SET button.
Press the TUNING/TIME ( or ) button once to advance the time by 1 hour. Hold it down to advance continuously. When the 12-hour display is selected, "AM" will change automatically to "PM".
5
In this example, the clock is set for the 24-hour (0:00) display.
Press the TUNING/TIME ( or ) button to adjust the minutes and then press the MEMORY/SET button.
1 2
Press the ON/STAND-BY button to turn the power on. Press the CLOCK button and within 5 seconds, press the MEMORY/ SET button.
Press the TUNING/TIME ( or ) button once to advance the time by 1 minute. Hold it down to change the time in 5-minute intervals. The hour will not advance even if minutes advance from "59" to "00". The clock begins counting from "0" seconds. (Seconds are not displayed.) The time display will disappear after a few seconds.
To confirm the time display:
3
Press the TUNING/TIME ( or ) button to select 24-hour or 12-hour display and then press the MEMORY/SET button.
Press the CLOCK button. The time display will appear for about 5 seconds.
Note:
The "CLOCK" or time will flash at the push of the CLOCK button when the AC power supply is restored after a power failure or unplugging the unit. Readjust the clock as follows. "0:00" "AM 12:00" "AM 0:00" The 24-hour display will appear. (0:00 - 23:59) The 12-hour display will appear. (AM 12:00 - PM 11:59) The 12-hour display will appear. (AM 0:00 - PM 11:59) Note that this can only be set when the unit is first installed or it has been reset. [Refer to "Clearing all the memory (reset)".]
To readjust the clock:
Perform "Setting the Clock" from the beginning. If the time display is flashing, step 3 (for selecting the 24-hour or 12-hour display) will be skipped.
To change the 24-hour or 12-hour display:
1 2 Clear all the programmed contents. [Refer to "Clearing all the memory (reset)".] Perform "Setting the Clock" from the beginning.
�8�
|
|
|
> |
|