|
|
|
Categories
|
|
Information
|
|
Featured Product
|
|
|
 |
|
|
There are currently no product reviews.
 ;
This service Manual for my JVC AV29BF10EES is very helful. Everything is show in detailed diagrams!!!! If you need really good source of information for this type JVC you are on the right place. I am satisfied and very glad for this excellent book. Thank you.
;
Great service, great value like always!!!
Some of the writing is a bit blur but all is usable.
A+++++++++++++++++
;
Great service manua!
Always great value and fast service A++++++++++++++++++
;
Excellent Service manual, good quality scans, quick service and very good value. Well reccomended ! All good.
;
Great value service manual!
Good-quality scans. Detailed and valuable informations.
A+++++++++++++++
SETTING CLOCK RESETTING THE MICROCOMPUTER
ditions: Press ON/STAND-BY button to enter the stand-by mode.
(Main unit operation)
q To erase all of the stored memory contents (clock and timer q If the display is not correct.
In this example, clock is set for the 24-hour (0:00) system. Reset microcomputer under the following con-
1
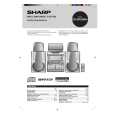
CD-DP2500H
2 Press the CLOCK button. settings, tuner and CD presets). 3 Within 5 seconds, press the MEMORY/SET button. q If the operation is not correct.
1 Press ON/STAND-BY button to enter the stand-by mode. 4 2 Whilst pressing down / button and the X-BASS display mode.
second. (0:00 23:59)
Press TUNING/TIME ( or ) button to select the time
�0:00� �The 24-hour display will appear. button, hold down the ON/STAND-BY button for at least 1
�AM 0:00� �The 12-hour display will appear. q �CLEAR AL� will appear. (AM 0:00 PM 11:59) Caution: (AM 12:00 PM 11:59) memory including clock timer settings, tuner and
�AM 12:00� �The 12-hour display will appear. q The operation explained above will erase all data stored in stalled or it has been reset.
q Note that this can only be set when the unit is first inCD presets.
5 Press the MEMORY/SET button. 6 Press TUNING/TIME ( or ) button to adjust the hour.
vance the time by 1 hour. Hold it down to advance continuously. automatically to �PM�.
q Press the TUNING/TIME ( or ) button once to ad-
q When the 12-hour display is selected, �AM� will change
7 Press the MEMORY/SET button. 8 Press TUNING/TIME ( or ) button to adjust the min-
OPERATION MANUAL
�8�
(Seconds are not displayed.) And then the clock display will disappear after a few seconds.
utes. q Press the TUNING/TIME ( or ) button once to advance time by 1 minute. Hold it down to change the time in 5 minute intervals. q The hour setting will not even if minutes advance from �59� to �00�.
9 Press the MEMORY/SET button.
q The clock starts operating from �0� second.
To see the time display:
Press the CLOCK button. q The time display will appear for about 5 seconds.
Note: q The clock display will flash on and off at push of the CLOCK button when the AC power supply is restored after a failure occurs or after the AC power lead is disconnected. If this happens, follow procedure below to change the clock time.
To change the clock time:
1 Press the CLOCK button.
2 Within 5 seconds, press the MEMORY/SET button.
3 Perform steps 6 9 above.
To change the time display mode:
Perform steps 1 2 in the section �RESETTING THE MI-
CROCOMPUTER�.
2 Perform steps 1 9 above.
|
|
|
> |
|