|
|
|
Categories
|
|
Information
|
|
Featured Product
|
|
|
 |
|
|
There are currently no product reviews.
 ;
Great PDF easy to read good info needed for replacment of belts and assembly and specs.
;
complete and unabridged very good quality
easy to download.
recieved in two days.
;
Awesome manual. Complete diagrams of all board assemblies as well as how to get to each part of the t.v. down to the individual screws and their locations. Get it.
;
perfect copy, im very satisfied, i was need the diagram over the powersupply and
the copy was very sharp
;
This is exactly the service manual I needed.
Complete with all schematics, partslists, PCB layouts and alignment instructions.
This manual covers both the T-4970 en T-488F Onkyo tuner.
SECTION 5 ADJUSTMENTS
Mechanical Adjustments
Pop Up Mechanism Adjustment 1. Turn on the power and set the disc to number 24. 2. With the power ON, while pres sing the TIME and MEGA CONTROL buttons, press the 1/u button to enter the test mode. 3. Rotate the JOG dial and select �CDM Test�. Press the JOG dial. 4. Rotate the JOG dial and select the mechanism adjustment mode. (�Mech Adjust� is displayed.) Press the JOG dial. 5. Keep pressing the TOP ARTIST 1 button to operate the loading mechanism, and continue pressing until the disc table locks. (Fig. 1) 6. Keep pressing the TOP ARTIST 2 button to raise the pop up part. 7. Loosen the adjusting screw, move the screwdriver left and right until the lever (POP UP) does not touch the slit wall, and secure the screw. (Fig. 2) The following buttons have special functions in this mode. TOP ARTIST 1 TOP ARTIST 5 TOP ARTIST 2 TOP ARTIST 6 button: Loading mechanism IN operation button: Loading mechanism OUT operation button: Pop up part UP operation button: Pop up part DOWN operation
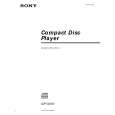
CDP-CX455
Table Sensor Adjustment 1. Enter the CDM Test mode and select �Mech Adjust� with the JOG dial, and press the dial. 2. Press the TOP ARTIST 1 button to operate the loading mechanism, and continue pressing until the disc table locks. (Fig. 3) 3. Loosen the fixing screw and move the holder so that both PLAY button LED (green) and the ALBUM SELECT button LED (green) light. If the holder is not in the correct position, the MEGA CONTROL button LED (orange) or the PAUSE button LED (orange) lights. 4. Moving the disc table right and left with a hand after the screw is fixed, the table will move by the play of a disc table. If the LEDs light up alternately, the adjustment will be performed correctly. (Fig. 4)
ALBUM SELECT
MEGA CONTROL
At this position,this part will be locked.
Fig. 1
At this position,this part will be locked.
Fig. 3
Cover (chassis 400)
Holder (table sensor 400) S tight, screw (PTTWH 3 � 6)
Lever (POP-UP 400)
Fix to the center so that the lever (POP-UP 400) does not touch the slit.
Table (400) assembly
Swing
Fig. 2 Fig. 4
25
|
|
|
> |
|