|
|
|
Categories
|
|
Information
|
|
Featured Product
|
|
|
 |
|
|
There are currently no product reviews.
 ;
Great price, Quick delivery, the document was very usefull A+++++++++++++++
;
Thank´s for your help, I already recived these manual from you
;
Thank you for your manual It has the basic things to and i use the Oszi for Longer Time.
THX
;
Actually, I was looking for this information for 3 years!...now thanks to you, the manual is on my hands and of great help, cause I understand now where I was doing wrong connections and wires...excellent, I'll be back to you if in need, thank you.
 ;
This manual covers the main equipment features only. While it also includes the procedure for saving and loading from the now long obsolete memory cards it does not mention the how to operate with the optional floppy drive interface so I am still at a loss about how to use this! Note that there is a separate manual covering the MIDI interface and programming via the keyboard, not included in this download. You will also need to get hold of this if you want to use the MIDI interface properly. Basically there is little difference between this manual and the free to download manual for the similar PR60 model.
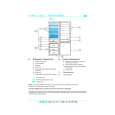
HOW TO OPERATE THE FREEZER COMPARTMENT
Making ice cubes
� Fill the ice cube tray 3/4 with water and place it at the bottom of the freezer compartment. To speed up the ice making process, place the tray on the bottom of the first drawer (as shown in the figure) and not on the ice pack rack (if provided). If the tray sticks to the bottom of the compartment, do not use pointed or sharp instruments to free it.
.
�
HOW TO DEFROST THE FREEZER COMPARTMENT
Defrost the freezer compartment once or twice a year, or when the ice on the walls reaches a thickness of about 3 mm. If possible, defrost the freezer compartment when it is nearly empty. � 24 hours before defrosting, press the fast freeze button (6); the LED (7) turns from green to yellow. This brings the foods to the lowest possible temperature. � Remove the food from the freezer compartment, wrap in a newspaper and group together in a cool place or in a portable cooler. � Disconnect the appliance from the mains power supply. � Remove the ice-cube tray. � Remove the baskets. � Pull out the defrost water drain from the base of the freezer compartment. � Leave the freezer compartment door open. Place the lower basket, which has a hole in the rear part, under the drain to collect the defrost water. Note: Do not use sharp or pointed metal instruments to scrape off ice; do not heat the freezer compartment artificially. Any damage to the appliance resulting from failure to observe these instructions is not covered by the guarantee. � Clean the freezer compartment using a sponge dampened in a solution of warm water and neutral detergent. Do not use abrasive products. � Rinse the interior and dry thoroughly. � Reconnect the appliance to the power supply. � Refit the drain in place and reposition the baskets. � Before putting the food back in the freezer compartment, press the fast freeze button (6). The green LED (7) turns to yellow.
Note: The increase in temperature of frozen food during defrosting can shorten its storage life.
17
|
|
|
> |
|