|
|
|
Categories
|
|
Information
|
|
Featured Product
|
|
|
 |
|
|
There are currently no product reviews.
 ;
I downloaded the document. The manual was complete, well scanned and everything was legible. I could zoom in see what I needed to know. There's not much more that you can ask.
;
It was complete service manual with all needed service informations. Thanks.
 ;
El manual esta muy detallado, los numeros de partes y los esquemas de despiece son correctísimos y muy claros, tanto para los técnicos experimentados como para los novatos.
;
Ottima qualità grafica e completo nelle notizie. Costo abbastanza contenuto.
;
Great and quick support. The maual was exactly what I was looking for and my problem
solved. Many thanks.
CH-X500
Disassembly method
Perform operations according to the items to be disassembled.
B
B
Bottom cover
<Replacement of the pickup>
1. After removing the exterior (top and bottom). 2. Proceed to the pickup replacement section. 3. When applying grease, refer to the exploded view. Use new grease.
B A B
Knob
Fig. 1
Remove A and turn in the direction of the arrow.
<Mechanism section>
1. Remove the exterior (required section only). 2. The mechanism section is designed so that each unit can be removed separately. 3. When reassembling, refer to the assembling precautions. (Use new grease when applying grease.)
Knob Bottom cover
B
B
B A B
<Exterior section>
Removing the bottom cover and front panel assembly (See Fig.1 to 4)
1. Remove the two screw A to unlock the mounting direction knob located on the side of the main unit. 2. Turn the mounting direction knob in the direction of the arrow using a coin, etc. to remove it. (The knob can be removed only when it is set to this position.) 3. Remove the four top cover fixing screws B at the triangle marks on the side of the main unit. (Perform the same operation on both sides.) 4. Turn the unit upside down so the bottom surface is facing upward. 5. Lift the rear edge of the bottom cover slightly and lift the side by grasping the DIN jack section on the side panel, then turn it toward the front (raise upward) to remove the bottom cover. 6. Unhook the four catches located on both sides of the front panel, and turn the front panel toward the top cover (lower down) to remove the front panel.
Remove A and turn in the direction of the arrow Fig. 2
The front panel can be separated by raising the cover.
Bottom cover
Fig. 3
Unhook catches
Slightly lift the jack section to remove.
Front panel Unhook catches
Fig. 4
1-4
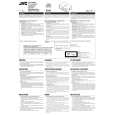 $4.99 CH-X500 JVC
Owner's Manual Complete owner's manual in digital format. The manual will be available for download as PDF file aft…
|
|
|
> |
|