|
|
|
Categories
|
|
Information
|
|
Featured Product
|
|
|
 |
|
|
There are currently no product reviews.
 ;
My first manual from Owner-Manuals.com but not the last! I am very satisfied with the easy ordering and promt delivery of a manual I did not find anywhere else.
 ;
This manual is very helpfull to use the Power Supply. All technical information has been available.
For service use the circuit diagrams are very good.
Thanks .
;
Very comprehensive document which is a must-have for any Satellit 2100 owner whose set up is somewhat intricate. Due to the bad quality of the pictures that are rather dark and a bit blurred I gave 4-star feedback.
;
The manual was missing 2 pages but when I presented the problem to the company they made every attempt to get the 2 pages to me, when they couldn't they refunded my money. A very pleasing and easy transaction. The manual they provided was the original, it was concise and to the point. I plan to do business with this company again when should the need arise.
;
The owners manual is very good. all my how to questions were answered in detail.
Using Your Cooktop
� � � � � � � � � � � � � � � � � � � � � � � � � � � � � � � � � � � � � � �
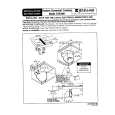
Cooktop At A Glance
_
1 - Left Rear 2 - Left Front
3 - Right Front (dualelement) 4 - Right Rear
,_
Hot Surface Indicator Lights
Your cooktop has Hot Surface Lights located next to the elements. These lights indicate when the adjacent cooking area is hot to the touch even after the control has been turned off. The red light will remain on until the area has cooled.
Suggested Control Settings
The size and type of cookware used and the amount and type of food being cooked will influence the setting needed for best cooking results. Electrical line voltage may also vary, which will affect the needed control setting. The settings indicated below serve as a guide. _ 7_i0 ...... 4_ ....... A fast heat to start cooking quickly and to bring liquids to a boil or blanch. (Medium High) for fast frying or browning foods, to maintainrapid boil of large amounts of food. (Medium)slow foods cookedamounts of food, and sauteing, For boil of large in a double boiler, most frying. (Medium Lo) To stew, steam, simmer; to continue cooking foods started on higher settings. Maintaining serving temperatures of foods, simmering foods, melting butter or chocolate.
Cooking Areas
patterns on the on your cooktop areidentified by permanent The cooking areasglass-ceramic surface. For most efficient cooking, fit the pan size to the element size. Pans should not extend more than 1/2 to I-inch beyond the cooking area.
Setting the Controls
� Thecontrolsarepush-turntype. To turn on the elements, push down and turn in either direction. � To turn on the dual element, turn clockwise from OFF to control the large element and counter-clockwise from OFF to control the small element. � When the control is in any position other than OFF, it may be turned without pushing down. � When the control knob is tm_ed ON, the ring around the control knob will glow. � When an element is turned ON, the cooking area will heat up and the red glow of the heating element will be seen through the glass-ceramic top. It is normal to see the red glow of the element whenever it cycles ON. The elements will cycle on and off for all control settings except HI.
a-o LO {:
Cookware
To achieve optimum cooking performance, use heavy gauge, flat, smooth bottom pans that conform to the diameter of the cooking area. (See "Cooking Made Simple" for cookware characteristics and recommendations.)
Wok Cooking
Use Jenn-Air's flat bottom wok (Model AO 142) for optimum results. The wok has a nonstick finish, wood handles, cover, steaming rack, rice paddles, cooking tips and recipes.
|
|
|
> |
|