Shopping cart is empty
 
English Polski Spanish 
Search For a Manual
 

(e.g. AA-V20EG JVC, ZX-7 Sony )
PayPal 1000+ rating Secure, Encrypted Checkout.
 
Who's Online
There currently are 6005 guests online.
Categories
Information
Featured Product
Home >> PANASONIC >> CWC100VU Owner's Manual
 
 0 item(s) in your cart 

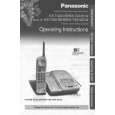
PANASONIC CWC100VU
Owner's Manual


Tweet about this product and get $1.00 of store credit for instant use!
  • Download
  • PDF Format
  • Complete manual
  • Language: English
Price: $4.99

Description of PANASONIC CWC100VU Owner's Manual

Complete owner's manual in digital format. The manual will be available for download as PDF file after You purchase it.

Owner's Manual ( sometimes referred to as User's Guide or User's Manual ) contains information on how to use Your device. After placing order we'll send You download instructions on Your email address.

The manual is available in languages: English

Not yet ready
You must purchase it first

Customer Reviews
There are currently no product reviews.
Other Reviews
 PRO-720HD/KUXC/CA PIONEER Owner's Manual by Bernie Role;
Great service. Manual is as advertised and delivered when promised.
 SL2500 SONY Owner's Manual by Gerjon Hofacker;
Perfect quality, highly appreciated service !!! Fast delivery of the download info, no issues at all. Recommended E-manual shop !!!
 743.576 9/8377 PRIVILEG Owner's Manual by Frank Kappler;
hi owners manual- crew, i am very satisfied about the trade with you. if i need some other manuals, i will contact you again. thanks frank kappler
 AG-A750-E PANASONIC Owner's Manual by alun webb;
Full Panasonic service Manual, as described, no problems
 VT-MX4080EM HITACHI Owner's Manual by Barbara Paulsen;
This place is amazing. Got our manual in a few hours. Print quality is excellent. Even the manufacturer didn't have this manual. The price was excellent. How many more stars can I give them? More than satisfied.

Text excerpt from page 3 (click to view)
2

AIR CONDITIONER INSTALLATION

ACCESSORIES
(6 pcs) XTN5D25A (5 pcs) CWH4580211 (6 pcs) XTT4D10C

SELECT THE BEST LOCATION (Single or Double Window hung window)
Front grille 19�3/ inches
16

12 inches

NOTE Check that none of the accessories are missing.

SIDE VIEW CABINET INSTALLATION

More than 4 inches

WINDOW REQUIREMENTS � Hot sun rays hitting the outside surface of the cabinet will create considerable heat load. If the outside of the cabinet is exposed to direct sunlight, consider building an awning to 22 to 42-1/8� shade the cabinet while providing ample area for the heated air to be exhausted from the condenser (both sides) and the top. This unit is designed for installation in standard double hung windows. NOTE The unit may also be installed �through the wall�. You should, however, observe standard carpentry practices and frame the opening without violating local ordinances.
15

1 Cut the �Sealing Ribbon�

to the proper length, and attach it along the bottom edge of the bottom window sash.

Window sash sealing ribbon

15/16� (min)

2 To prevent condensation

water from dripping inside, the cabinet should be installed level or very slightly tilted to the outside.

3 Secure the cabinet using screws. Type A screw Inside of sash Top angle Expandable panel Window sill Type A screws Window sash foam seal Outside of sash Window sash Sealing ribbon

INSTALLATION PROCEDURES
Type B screws 1 Remove the rear cabinet screws and save for later use. 2 Slide the chassis out from the cabinet.

HOW TO ASSEMBLE THE EXPANDABLE PANELS
Top angle Top sealing ribbon (To be attached to the top angle) Type B screws

� Expand the expandable panel fully into the grooves of the window frame, secure the expandable panel, left, right and top mounting frames to the bottom of the window sash using 4 screws type A and 2 screws type B. � Secure the cabinet using wood screws type A. � Cut the window sash foam seal to the proper size and seal the opening between the top of the inside window sash and the outside window sash. NOTE If a gap exists between the unit and window sash, you may use �Sealer� supplied with the installation kit for a better seal. CHASSIS INSTALLATION INTO THE CABINET

Expandable panel Side sealing ribbon (To be attached to the expandable panel) Type C screws

1 Slide the chassis into the cabinet. 2 Reinstall the cabinet screws.

NOTE This procedure applies to left and right of assembling expandable panel.

Secure the cabinet to chassis by using screws (from rear cabinet).

� Attach the top angle to the cabinet using screw type B (3 pcs). � Insert expandable panels to cabinet sides as shown. � Secure the first fold of expansion panel to cabinet using screw type C (3 each).

You might also want to buy

$4.99

CWC100VU PANASONIC
Service Manual

Complete service manual in digital format (PDF File). Service manuals usually contains circuit diagr…
>
Parse Time: 0.364 - Number of Queries: 111 - Query Time: 0.166