|
|
|
Categories
|
|
Information
|
|
Featured Product
|
|
|
 |
|
|
There are currently no product reviews.
 ;
Correct manual received and of good quality but the contents of the file for the Service Manual for the same monitor is for a 20" TV not the RGB Monitor.
;
The owners manual for the Pioneer VSX-D603S was exactly what I needed. I received it in a timely manor and it was priced fairly. I definately will use your servise again. Thank You
;
This is a great manual. It was easy to read and very accurate. The size of the manual is small so email is no problem. I highly recommend it. The manual is very hard to find other than this website.
;
Manual was complete and available promptly, since I had lost my original manual. Very good response.
;
Whilst this is a photo copy, and some of the pages are a little askew, it was all readable and intact. A real bonus finding an old manual for a classic piece of kit that no other site had.
Great stuff.
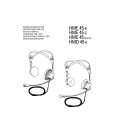
2 Anschluss
Siehe Abb. 5. 1. �ffnen Sie die Fixierungsschraube (1). 2. Ziehen Sie das XLR-Steckermodul (2) aus dem Mikrofonschaft heraus. 3. Damit Sie die Fixierungsschraube (1) nicht verlieren, drehen Sie sie wieder in das Gewinde am XLR-Steckermodul hinein.
Bauen Sie das Sendermodul ein:
2
Abb. 6: Sendermodul einbauen Siehe Abb. 6.
1
1. Vergessen Sie nicht, den Zustand der Batterie im Sendermodul zu kontrollieren. Legen Sie eine neue Batterie ein, falls die derzeitige verbraucht ist oder sich gar keine Batterie im Sendermodul befindet. 2. Halten Sie das Sendermodul (1) so, dass die Kontakte (2) zum Mikrofon zeigen. 3. Schieben Sie das Sendermodul (1) so weit in den Mikrofonschaft hinein, bis das Sendermodul (1) hörbar einrastet. Das Sendermodul verriegelt sich automatisch, die elektrischen Kontakte zum Mikrofon werden automatisch hergestellt. Näheres zum Einlegen, Tauschen und Testen der Batterie sowie zum Einstellen und Betrieb des Sendermoduls finden Sie in der Bedienungsanleitung des Sendermoduls TM 40. 1. Führen Sie einen Kugelschreiber, kleinen Schraubenzieher oder ähnlichen spitzen Gegenstand in die �ffnung (1) im Mikrofonschaft ein und drücken Sie nach innen. Das Sendermodul (2) wird entriegelt und gleitet ca. 2 mm aus dem Mikrofonschaft heraus. 2. Ziehen Sie das Sendermodul (2) vom Mikrofon ab. 3. Drehen Sie die Fixierungsschraube (4) aus dem XLRSteckermodul (3) heraus. 4. Schieben Sie das XLR-Steckermodul (3) bis zum Anschlag in den Mikrofonschacht hinein. 5. Fixieren Sie das XLR-Steckermodul (3), indem Sie die Fixierungsschraube (4) fest anziehen.
Hinweis:
Wenn Sie das Sendermodul wieder gegen das XLR-Steckermodul austauschen wollen: Siehe Abb. 7.
6
|
|
|
> |
|