|
|
|
Categories
|
|
Information
|
|
Featured Product
|
|
|
 |
|
|
There are currently no product reviews.
 ;
Great price, Quick delivery, the document was very usefull A+++++++++++++++
;
Thank´s for your help, I already recived these manual from you
;
Thank you for your manual It has the basic things to and i use the Oszi for Longer Time.
THX
;
Actually, I was looking for this information for 3 years!...now thanks to you, the manual is on my hands and of great help, cause I understand now where I was doing wrong connections and wires...excellent, I'll be back to you if in need, thank you.
 ;
This manual covers the main equipment features only. While it also includes the procedure for saving and loading from the now long obsolete memory cards it does not mention the how to operate with the optional floppy drive interface so I am still at a loss about how to use this! Note that there is a separate manual covering the MIDI interface and programming via the keyboard, not included in this download. You will also need to get hold of this if you want to use the MIDI interface properly. Basically there is little difference between this manual and the free to download manual for the similar PR60 model.
Observe the following color-codes: Left+: White Left�: White with black stripe Right+: Gray Right�: Gray with black stripe 4. If you are connecting your Decade Series amplifier to a source unit with output voltage higher than 4V, connect the output signal wires of the source unit to the floating ground factory head unit inputs. Because the inputs have an impedance of 100K ohms, this connection will provide the best noise-free performance possible.
Setting Input Sensitivity Proper input sensitivity control settings on Decade Series power amplifiers are critical to ensure optimum performance, low noise levels and maximum system reliability. As a general rule, controls at the front end of a system (source, equalizers and other processors) should be set as high as possible with the amplifier input sensitivity set as low as possible while still providing adequate volume levels. Using a high signal level and a low sensitivity setting will help keep background noise in the system to a minimum.
System Setup and Adjustment
Electronic Crossover The electronic crossover(s) in your Decade Series amplifier can be selected as a 12dB/oct. high-pass filter at 120Hz (HPF), a 12dB/oct. low-pass filter at 80Hz (LPF) or it can be defeated (FLAT).
Initially, turn the input sensitivity GAIN control to its minimum (counter-clockwise) position. 1. Reconnect the (�) negative lead to your vehicle�s battery. Apply power to the audio system and play a favorite music track from a CD or tape. (Note: After the source unit is on, the JBL badge (on the top panel) will illuminate, indicating the amplifier is on. If not, check the wiring, especially the remote connection from the source unit. Also refer to �Troubleshooting� on page 7.) 2. On the source unit, increase the volume control until it is approximately 3/4 of its maximum output level. Slowly increase the Input Sensitivity control (clockwise) toward three o� clock and, at the same time, listen to the quality of the reproduced sound.
At some point, you�ll hear distortion on the music peaks. Stop the adjustment and turn it back slightly. This is the maximum undistorted output level of your system, and should not be exceeded during use. 3. After adjusting the level of the main speakers in your system, you should adjust the remaining channels (if you are using a DA3504 or a multi-amp system) for the desired system balance. You�ll find this easiest to do by adjusting the channels in the following order: 1) front speakers, 2) rear speakers, 3) subwoofer. Elaborate, multichannel systems may be too complex to adjust. Your local JBL installation specialist is the best person to help with such adjustments.
5
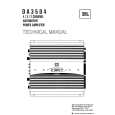 $4.99 DA3504 JBL
Service Manual Complete service manual in digital format (PDF File). Service manuals usually contains circuit diagr…
|
|
|
> |
|