|
|
|
Categories
|
|
Information
|
|
Featured Product
|
|
|
 |
|
|
There are currently no product reviews.
 ;
Just what I needed to repair my CT-F600, clear pdf, easy to tread and navigate
 ;
Yes, cost is low. And quality of some diagrams is low too.
;
Quick response.
Good quality.
Not large price of documents.
Thanks.
Dzięki.
;
All ok:
Good quality.
Quick response.
Not large price of documents.
Thanks
;
The manual was complete and extremely helpful in both diagnosing the problem I was having as well as fixing it. Excellent quality. I will getting additional manuals in the future.
2-1-3. How to Set the Optical Sensor Disc 1) Fit a lug on the sensor side of optical sensor disc in the hole of the drive.
2-1-4. Precautions on Adjustment 1. Adjustment data The adjustment data for the drive block are recorded to the IC4403 on the VC-410 board. These data cannot be read or written from the adjustment remote commander or SeusCam, unlike the camera and LCD adjustment data. Accordingly, be sure to adjust all items of the drive adjustment when the following parts were replaced: � Drive block � Mounted VC-410 board � IC4101 (REC/PB RF amp.) on the VC-410 board. � IC4201 (Digital signal processor) on the VC-410 board. � IC4502 (Mecha drive) on the VC-410 board. 2. Order of adjustment Adjust the drive block in the following order: 1) POWER Adjustment 2) DVD-R Adjustment 3) DVD-RW Adjustment 4) DVD+RW Adjustment 3. Precaution on the laser diode
Fit a lug in the hole of drive.
Fig. 6-2-3
2) Push in the optical sensor disc until it clicks in the same manner as when setting a disc.
In the POWER Adjustment, operate the drive with the disc cover left open. During the adjustment, be sure to observe the following precautions: 1) Set the optical sensor disc correctly. 2) Keep the distance of more than 30 cm apart from the camcoder. 3) Work on the lens side of the camcoder (opposite side of the drive). Note: Laser light of the equipment is focused by the object lens in the optical pick-up so that the light focuses on the reflection surface of the disc Therefore, be sure to keep your eyes more then 30 cm apart from the object lens when you check the emission of laser diode
Pickup Lens (Laser Diode)
Fig. 6-2-4
Fig. 6-2-5
DCR-DVD7/DVD7E 6-41
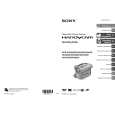 $4.99 DCRDVD7 SONY
Owner's Manual Complete owner's manual in digital format. The manual will be available for download as PDF file aft…
|
|
|
> |
|