|
|
|
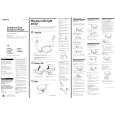
Categories
|
|
Information
|
|
Featured Product
|
|
|
 |
|
|
There are currently no product reviews.
 ;
A very easy to understand and use manual. Well worth the money.
 ;
Very good information with clear drawings. Thanks!
;
The ease of this purchase was a good start. The content of this manual was exactly all I needed to retore my Tandberg 64.
All of the mechanical and electrical information is contained in the manual and the quality of the document makes reading the data easy.
The exerience with the resource has made this my prime source for technical data.
;
Owner-manuals.com is the best Possibility to give vantage HIGH CLASS Elektronic COMPONENTS
a new Life.Thanks alot for your perfekt Service.
;
I am proud of you. In the future, I benefited from your services.
SECTION 4 SERVICE MODE
Service Mode (service program) The equipment is provided with a service program built in the microcomputer, like conventional models. Service program operation methods are described in the following.
REPEAT/ENTER Tracking gain-up mode while pressing HOLD OFF n ON Be sure to turn OFF the HOLD switch (if ON, pressing each key is deactivated) PLAY MODE Tracking servo and sled servo are turned ON
� Step 3 (Resetting service mode ) 1. Be sure to disconnect the external power supply and remove the solder bridge at the TEST terminals connected in setting. 2. The set thus becomes available for normal operation.
� MAIN BOARD � (Side A)
p
^
= (FR) The optical pick-up is moved inwardly + (FF) The optical pick-up is moved outwardly
^ (PLAY/PAUSE) FOCUS is turned ON to effect pull in mode p (STOP) All servos are turned OFF
Fig. 3 Layout of each key
� Step 1 (Service mode setting method) 1. Turn OFF the HOLD switch the external power supply disconnected (power is not applied to the set). 2. Solder across the T802 (TEST) terminals (pin %�, IC801 (TEST) is grounded). 3. Connect an external power supply. Thus, the set is switched to the service mode. � Step 2 (Operation in the service mode ) 1. Once the service mode is effected, the LCD displays 5 indications each of which is repeatedly displayed. However, the following operations can be activated even if LCD indication is effected. 2. By pressing the + or = key, the optical pick-up movable inwardly or outwardly. However, if this is activated, tracking servo and sled servo are turned OFF, so it can be turned ON by pressing the PLAY MODE key, if required. 3. By pressing the REPEAT/ENTER key, the tracking gain-up mode becomes active. 4. By pressing the ^ key, focus is turned ON from focus searching while entering CLV-S (pull-in mode). Without disc, focus searching is repeated continuously. 5. By pressing the PLAY MODE key, tracking servo, sled servo and CLV-A (servo in PLAY) are turned ON. 6. When 4. and 5. are performed, playing begins. No muting is ON in the service mode. 7. By pressing the p key, all servos (focus tracking and sled) are turned OFF. However, the disc motor revolves for a while by inertia.
T802 (TEST) Normal mode : Open Test mode : Short
Fig. 4 Location of test terminal
�7�
 $4.99 D-E440 SONY
Owner's Manual Complete owner's manual in digital format. The manual will be available for download as PDF file aft…
|
|
|
> |
|


