|
|
|
Categories
|
|
Information
|
|
Featured Product
|
|
|
 |
|
|
There are currently no product reviews.
 ;
Fast delivery and good quality copy. To be recommended
;
Excellent product, very clear print. Detailed circuit and assembly diagrams - this enabled me to repair my CD player with confidence. I highly recommend this site.
;
Fast access, 100% correct and complete service manual
;
just what i was seeking .had a password issue but the review allowed me to circumvent and download was great
;
Great manual, great price. Has a few of the basic operating instructions that most service manuals leave out. Complete instructions for disassembling board by board, safety precautions, schematics, complete parts list.
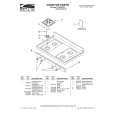
DEH-2350,1350
- Removing the Upper Frame
1. Remove six Springs A, two Springs B and four Screws. 2. Remove two Tabs situated on rear side of the Upper Frame, remove two Arms on the front side, then remove two Tabs on the front side.
B A A A A Upper Frame
Arm
A
Arm B A
- Removing the Carriage Mechanism
1. Disengage the Carriage Mechanism from the two dampers situated in the front side by driving it up, then disengage and remove the mechanism from the one damper by driving it up aslant into front side direction. Note : When assembling the Carriage Mechanism, coat the dampers with alcohol prior to the assembly.
Carriage Mechanism Section
- Removing the Clamp Arm Assy
1. Remove a Spring A, a B and a Spring C. 2. Drive the Clamp Arm Assy up into rear side direction, then disengage the arm from its current position Finally, drive the assembly approximately 45 degrees upward, then slide the assembly toward right side to remove it.
A
Clamp Arm Assy Section B
C
43
|
|
|
> |
|