|
|
|
Categories
|
|
Information
|
|
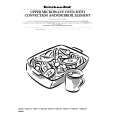
Featured Product
|
|
|
 |
|
|
There are currently no product reviews.
 ;
Original well scanned manual. Got the job done. Microwave problem found & corrected. For $5 and a new magnitron from ebay, it was a cheap and good the first shot fix. Electrical schematics allowed me to mage sure every thing else was ok before cutting and order for parts. Hard to live without.
;
I was very skeptical of this website, I have never downloaded manuals before. I put it on the AMEX and payed through Paypal to ensure protection. I got the manual exactly as described and now I can replace the filter capacitor for this amp. Great Price, others selling for 12.99 or more and this is the same manual. I will search out this website for other manuals. Thank you
;
Manual was reasonably easy to follow. I am not an engineer or know much about electronics but with the manuals help I was able to figure out the problem, identify the part required for the repair. Replacement part cost around $30. Whilst replacing the part I was telling myself, "this aint gonna work cos it seems far too easy". Took about 15 minutes to do and my plasma TV works a treat. Would never have been able to do this without the service manual.
;
It is OK, this manual help me to repair my dynacord
 ;
Good manual. Even it is an old printed manual, it is well scanned and complete, with all drawings, schematics and parts list. Very good return for the cost.
1
2
3
4
7. GENERAL INFORMATION
7.1 DIAGNOSIS
A
7.1.1 DISASSEMBLY
- Removing the Case (not shown) 1. Remove the Case.
- Removing the CD Mechanism Module (Fig.1)
CD Mechanism Module
1
B
Remove the four screws.
Disconnect the connector and then remove the CD Mechanism Module.
1 1
- Removing the Grille Assy (Fig.1)
2
C
Remove the two screws and then remove the Grille Assy.
1 2 1 2
Grille Assy
- Removing the Tuner Amp Unit (Fig.2)
Fig.1
1
D
Remove the screw.
2
2 2
2 3 4
Remove the three screws.
Straighten the tabs at three locations indicated. Remove the screw and then remove the Tuner Amp Unit.
4 1
E
3
3
3
Tuner Amp Unit
Fig.2
F
54
1 2
DEH-P3600MP/XM/EW
3 4
|
|
|
> |
|