|
|
|
Categories
|
|
Information
|
|
Featured Product
|
|
|
 |
|
|
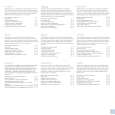
There are currently no product reviews.
 ;
Dear Sirs,
Thank you for the fast support, the manual does provide all necessary information to repair the radio. All schematics are in a good quality for reading.
The manual fits 100% to my requirements as a technican.
Kind regards Thomas
;
the big video recorder format s-vhs many features delicate in loading system of the cassette. Such machines are no longer manufactured, it would be too expensive.
 ;
THIS MANUAL IS VERY GOOD AND VERY CLEAR
PLEASE NOTE IT DOES NOT CONTAIN THE SETUP INFORMATION TO ALIGHN THE GEARS IN THE CD MECH IT DOES SHOW ALL THE PARTS AND THEIR LOCATIONS .
;
Complete service and operation manual. All schematics are there, all circuit boards AND add-on boards. Including exploded views ,component names and specifications. Also electrical and mechanical adjustment procedures are in this manual. This manual also covers the more advanced BR-S811E unit. Scan quality is fair and usable.
;
High quality scan of original Service Manual. Everything´s fine!
DEX-P9,P9R
The numeral enclosed by a circle in the drawing indicates the order of removal.
- How to hold the mechanism unit
1. Hold the top frame and main frame. 2. Do not hold the front of the top frame tightly because its strength is low.
- How to remove the top frame and main frame
1. Remove the screws (4) and screws (2) of the top frame in the clamped state and remove the top frame. 2. After having removed the screws of the dampers (2) on the right and the dampers, remove the main frame. 3. Remount the product connector with the frame removed and eject a disk. Top Frame
Main Frame
Disk
Damper Damper
- How to remove the clamper arm assy and guide arm assy
1. Remove a total of three right, left and rear screws and remove the clamper assy. 2. Remove the left spring and remove the torsion spring hook of the right fulcrum unit. 3. Remove the E ring of the left fulcrum and remove the guide arm assy. Guide Arm Assy
Clamper Arm Assy
66
|
|
|
> |
|