|
|
|
Categories
|
|
Information
|
|
Featured Product
|
|
|
 |
|
|
There are currently no product reviews.
 ;
I got the manual quickly after the payment was transfered (1 day). The manual was exactly what i needed and the updates via e-mail were great. Thanx!
;
I've looked for this manual all over that internet, you guys had it and to a good price. A++++
;
I've looked some time for this manual, you guys had it and to a good price. A++++
 ;
factory technician level - complete with board views :
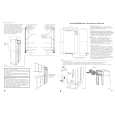
( removing chassis from cabinet , only thing missing ) ;
on weekends , staff is not available so - be patient .
;
Good complete Service-Manual (SONY PVM6041QM)
A few graphics and waveforms not very clear! (-1*)
3.4.2.
INITIAL SETTINGS:
When you replace the Main PCB, be sure to perform the initial settings after achieving the adjustment by ordering the following procedure in accordance with model suffix of the unit. 1. IMPORTANT NOTICE: Before proceeding Initial settings, be sure to read the following CAUTIONS.
2. PROCEDURES: � Preparation. Proceed the picture back up from the unit (Refer to above "CAUTION 2") � Step 1. The temporary cancellation of initial setting: Set the mode dial to �[ Normal picture mode ] (Red camera mark)�. While keep pressing [E.ZOOM ] and �[ UP ] of Cross key� simultaneously, turn the Power on. � Step 2. The cancellation of initial setting: Set the mode dial to �[ Playback ]�. Press [E.ZOOM ] and �[ UP ] of Cross key� simultaneously, then turn the Power off. � Step 3. Turn the Power on: Set the mode dial to �[ Normal picture mode ] (Red camera mark)�, and then turn the Power on. � Step 4. Display the INITIAL SETTING: While keep pressing [ MENU ] and �[ RIGHT ] of Cross key� simultaneously, turn the Power off.
10
|
|
|
> |
|