|
|
|
Categories
|
|
Information
|
|
Featured Product
|
|
|
 |
|
|
There are currently no product reviews.
 ;
This GRUNDIG UV5A Owner Manual is not only an instruction manual but a total functional circuit description of the Multimeter and includes circuit diagram at the end pages. It is very helpful for repairing and calibrating the instrument. It is written in two languages English and German for international support. It was very easy to repair my unit with this document. Regards, Regis Pauly, Electrical Engineer.
;
The owner's manual was evetything I thought it would be. I was able to print it out using both sides of the paper in quick order, saving me a search online for a used one.
 ;
Хорошее качество сканирования.
Мануал пришел часов эдак через 12. В целом доволен.
;
Fantastic quality and impressive delivery time. Based on this manual, I recommend this service without hesitation! Five Stars for certain.
;
Was happy to find the complete owners manual... It's all in there, just like the original...
http://getMANUAL.com
To write shot marks
To write shot marks in recording and assemble mode Under Shot Mark Operation menu item G04, select the type of mark you want to write. To write a mark, press the TRIM+/MARK button while holding the ENTRY/SHIFT button at the point where you want to write the mark. The message �RECORD SHOT MARK� appears on the LCD monitor and in the lower part of the sub LCD while the mark is being written. To write marks in playback, stop, and search modes You can only write Post Marks in these modes. To write a mark, press the TRIM+/ MARK button and keep it pressed for 2 seconds or longer. This puts the unit into shot mark write and delete mode (the ENTRY/SHIFT button flashes). At the position where you want to write the mark, press the TRIM+/ MARK button while holding the ENTRY/SHIFT button. The message �RECORD SHOT MARK� appears on the LCD monitor and in the lower part of the sub LCD, and the REC button lights while the mark is being written.
Note
5-2-3 Creating a Virtual Shot Mark
During playback or search, press and hold the ENTRY/SHIFT button, and press the TRIM+/MARK button while holding the ENTRY/SHIFT button. A virtual shot mark is entered, and the message �V-MARK xxx� appears on the LCD monitor and in the lower part of the sub LCD (xxx is the mark number).
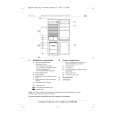
5-2-4 Displaying Shot Mark List
To display the shot mark list, press and hold the ENTRY/SHIFT button, and press the TRIM�/LIST button while holding the ENTRY/SHIFT button. Press the buttons again to cancel the display. The figure on next page shows the contents of the shot marker list.
Chapter 5 Shot Mark/Shot Data
LTC user bits are used to record shot marks. If LTC user bits are used for recording other data, this data may be affected by the shot marks.
Shot Mark/Shot Data
5-5
|
|
|
> |
|