|
|
|
Categories
|
|
Information
|
|
Featured Product
|
|
|
There are currently no product reviews.
 ;
Ckear manual, well reproduced with plenty of overlap on critical pages.
;
I buy the service manual cheaper here than in elsewhere.Am happy with this site. I recommended the Owner-Manuals.com
;
Great Manual. It was exactly what I was looking for
;
Great Manual. It was exactly what I was looking for
;
I am really satisfied. It was ceap, easy and quick. Te owner manual is a full service book. I got what I expected. Thx
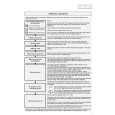
6-5. LCD unit (1) Remove four screws and lift the LCD unit from the upper case. Be careful not to touch or press the LCD surface.
6-6. Keyboard unit (1) Peel off guidance plate. (2) Unscrew five screws and remove cover RK. (3) Remove rubber key. (4) Peel off W tape RK. (5) Remove key ass�y. When you assemble, do not forget to insert the FFC joiner of the key unit through the slit on the upper case.
Page 17
|
|
 |
> |
|