|
|
|
Categories
|
|
Information
|
|
Featured Product
|
|
|
 |
|
|
There are currently no product reviews.
 ;
PDF Contains
Technical Data, Mechanical data, Detailed Circuit diagram with components value, PCB layout. Actual PCBs Print. Component List, Spare parts code list and Input output detail. It cover LBB1211, LBB1212, LBB1213, LBB1216, LBB1217.
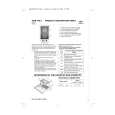
It is the actual Service Manual for SQ10
;
very good manual with clear electrical schemes. Very helpful to find wat was wrong inside my microwave.
 ;
Hi, thankyou for providing the Nordmende Globetrotter original manufacturer's repair manual. Quality is very good and sharp - the PDF file was comfortably small to download. The only question is: why did it take so long to become ready for download?? Many thanks anyway, I fixed the fault in the radio thanks to the circuit.
regards: Nick
;
This was super service.Ordered this manual and was reading the download an hour later
;
as always, rapid and efficient, very good and clear prints
details clearly visible keep going this way!!!!!!
7. BAR CODE CALIBRATION SETTING
7-1. About the calibration setting.
Since DT-900 employs swing angle controlling, it is necessary to set bar code calibration (criterion of swing angle setting). The setting has already done in the factory. Perform the setting only when LASER ASSY or MAIN PCB is replaced. Setting procedure is as follows. (1) Read a calibration setting bar code and memorize the calibration value in FROM. (2) Confirm that laser swing amplitude varies in accordance with bar codes.
7-2. Operation
1 Turn the unit on while pressing down [S] and [ � ] keys. SYSTEM MENU appears. SYSTEM MENU 1. 2. 3. 4. 5. EXECUTE AP SET MODE D AT E / T I M E TRANSMIT VERSION
2 Press [2] key to select SET MODE.
MODE SET 1. 2. 3. 4. ENVIRONMENT D I S P L AY M O D E BARCODE SET ID
3 Press [9] key to select CALIBRATION. � It is not shown on the menu. � Confirm that the green LED lights.
O B R C A L I B R AT I O N PLEASE PUSH TRG KEY T R G : S TA R T CRL : EXIT
4 Press down TRIGGER or [L] keys for more than one second to start calibration setting. Note: When reading a barcode, short time of key depression may cause an error. Press keys for more than one second. � Apply a laser beam on calibration setting bar code printed on the instruction manual. � Touch the nose of Handy Terminal on the center of the bar code and match laser beam and both end�s guide lines).
O B R C A L I B R AT I O N PLEASE PUSH TRG KEY T R G : S TA R T CRL : EXIT
Note: Correct bar code must be used in accordance with the reading window.
Page 25
|
|
|
> |
|