|
|
|
Categories
|
|
Information
|
|
Featured Product
|
|
|
 |
|
|
There are currently no product reviews.
 ;
very fast detailed and accurate hope to do business again
;
This was precisely what I was looking for. Complete and good quality!
 ;
This is the ONLY copy of this manual I could find for a realistic price. Even Panasonic could not provide me with one.
The PDF is a very good copy and it helped me diagnose and find the fault with the unit I have.
;
Very complete and well reading drawings. Documentation is essential for successful repairs.Good documentation, with all that is necessary. This manual was what I was waiting with all the information necessary for the repairing I need it for. You must buy it if you want to do repairs or simply understand how it works.
;
Excellent service manual includes everything is need to repair this radio-caseete, how to disassemble, wiring diagram, all , waiting time until the download was only a few hours. I'm going to buy service manuals from here, are cheap and very good.Thank you.
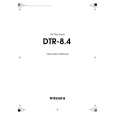
DTR-8.4 PANEL VIEWS
REMOTE CONTROLLER
Tape Mode
Tape mode is used to control an Integra/Onkyo cassette recorder connected to the DTR-8.4 via . To select Tape mode, press the scroll wheel. "AMP" appears on the display. Note: While neither the [Input] button nor [Mode] button is illuminated, the scroll wheel changes the input source and remote controller mode simultaneously (e.g., set the input source and mode to "TAPE.")
Scroll wheel
1 Mode button
5
This button is used with the scroll wheel to select the remote controller modes. Press the scroll wheel until "AMP" appears on the display. 2 Previous/Next [ ]/[ ] buttons The Previous [ ] button is used to select the previous track. During playback it selects the beginning of the current track. The Next [ ] button is used to select the next track. The Previous/Next [ ]/[ ] buttons make not work properly with some cassette tapes depending on how they were recorded.
3 Rewind/FF [
]/[ ] buttons The Rewind [ ] button is used to start rewind. The FF [ ] button is used to start fast forward.
4 Rec [
1
6
7
] button This button is used to start tape recording. 5 Light button This button is used to turn on or off the remote controller's illuminated buttons. 6 Input button This button is used to select the input source. Press this button first, and then roll the scroll wheel until "TAPE" appears on the display.
7 VOL button
8 2 3
10
This button is used to set the volume of the DTR-8.4.
8 Muting button
9
4
11
This button is used to mute the DTR-8.4. This function can be set only with the remote controller. 9 Play [ ] button This button is used to start tape playback.
10 11
Stop [ ] button This button is used to stop tape playback. Reverse Play [ ] button This button is used to start reverse playback.
15
|
|
|
> |
|